
Peugeot Boxer L2H2 family van conversion
Our first van was a Vauxhall Vivaro, we converted it into a basic camper with no running water or electrics and lived in it for a short while before closing on our first cottage. We spent 6 years going on adventures in the UK and Europe and took our new baby with us on our last few trips before deciding it was time for a bit bigger van!
Jump to a section:
Stage 1: Prep
Stage 2: Finalise design
Stage 3: Cutting holes, fixing seats + sound proofing
Stage 4: Floor
Stage 5: Ikea SKORVA bed hack
Stage 6: Fitting the MaxxAir MaxxFan Deluxe
Stage 7: Installing solar panels + insulation
Stage 8: Diesel Heater installation
Stage 9: Electrics
Stage 10: Kitchen cabinet
Stage 11: Framing out the rest of the van + creating niches
Stage 12: Cladding the ceiling and walls
Stage 13: Overhead storage + Bulkhead
Stage 14: Toddler bed
Stage 15: Back doors
Stage 16: Those awkward bits
Stage 17: Finishing touches
Stage 18: New baby bed addition
Our finished van in pictures!
What has helped us with our camper van build

The day we got it!

First dinner in the van (Fish & Chips of course)
Why a Peugeot Boxer L2H2?
We chose the Peugeot Boxer L2H2 for a few key reasons. First, Harri needed a van for his business, but it also had to be versatile enough for family adventures. The L2H2 struck the right balance—it’s spacious enough for both work and travel while still compact enough to fit within our limited parking space. A long wheelbase was out of the question, so this size was the next best option.
We also considered the Citroën Relay and Fiat Ducato, as they share many interchangeable parts with the Boxer, which makes future repairs easier and more affordable. However, finding a van of this size with the right features was challenging, and it took time to plan the best layout for both our family and business needs. Hopefully, our experience helps other families navigating a similar journey!
Our Design Requirements
5 Seater van (3 in the front 2 in the back with chest belts and isofix points)
Sleeping arrangements for 4
Removable bed and back seats to use as work van and accommodate ton bags
Windows + lots of natural light
Basic electrics (lights, charging points, fridge, fan and heater)
Solar panels
Large garage area
Roof rack and ladder
Stage one: Prep
We began by removing the ply lining and floor, setting them aside to reuse later. Fortunately, we didn’t uncover any major issues—just a few minor rust spots and screw holes from where the floor had been fixed. To tackle the rust, we used a drill with a wire brush attachment and sanded down the affected areas. We then primed them with Hammerite Red Oxide before finishing with Hammerite Smooth White.
For the screw holes, we used JB Weld, which came highly recommended by other van converters for its ease of use. After reading a few reviews online, we were convinced it was the right choice. Once the holes were smoothed down, we filled and painted them.
A tip we picked up from a Facebook group was to check the door rail, a common area where water can seep behind and cause rust due to metal-on-metal contact. Although ours wasn’t in bad shape, we treated the affected spots and placed a cut-up bicycle inner tube behind the rail to prevent future rubbing. To further safeguard against water, we applied Sikaflex above the rail for an extra layer of protection.
Shopping list
Hammerite red oxide primer
Hammerite smooth white metal paint
Sikaflex 522 sealant

Lifting up the floor, cleaning, filling and prepping screw holes from where it was fixed down

Blank canvas!
Stage two: Finalise design
Before we even got the van, we had already started discussing the design and creating mood boards, but we didn’t finalise the layout until after purchasing the rear seats. We opted for Ford Transit Custom modular seats with integrated seat belts and ISOFIX points. These seats can fold flat or fold forward, offering the option to convert them into a bed or have more floor space. They’re also removable thanks to their quick-release feature. We chose them for their family-friendly design and the flexibility they provide—perfect for switching between work mode and different adventures, depending on how many people we need to accommodate.
Over several weeks, we experimented with the physical layout to ensure it was the best fit for our family. We created scaled floor plans and used the online tool "Plan Your Van" to visualise the space in 3D. While the tool wasn’t entirely accurate, it gave us a good sense of how much room each element would take up.
Once we had the layout nailed down, we shifted our focus to the electrical system. To get started, we booked a consultation with Tom from Tiny Build Electrics to help us plan the best approach for this crucial part of the build.
Resource List
Plan Your Van 3D design software (free version)
Adobe Illustrator for flat layouts (but you could use any other software or pen and paper!)
Electrical consultation with Tiny Build Electrics

Mood board for inspiration and rough layout ideas
Stage three: Cutting holes, fixing seats & sound proofing
This is where things started to get exciting (and a little scary)! We installed three windows in the van, and to our surprise, it was a fairly straightforward process. We used the drill-hole method followed by a rough cut to access both sides of the panel when cutting with the jigsaw—a technique that worked really well. Upgrading to a cordless jigsaw proved to be a good move, making the job much easier and more efficient for future tasks. Each window came with one tube of bonding, but we picked up an extra just in case, which proved to be a good call as we ended up needing it. The last thing we wanted was to run out of supplies mid-project!
For the rear seat installation, a friend came to help, as this was definitely a two-person job. We had to drop the exhaust to install the spreader plates underneath. While many people raise the floor to align their rear seats with the front, we opted to keep the floor level throughout the back since it's primarily a work van. This gives us more usable space when the seats aren’t in use—though time will tell if it was the right choice!
We also removed the bulkhead and began soundproofing. We used Deadsound, which turned out to be a fantastic product and one of the best value options on the market. It’s peel-and-stick, making it incredibly easy to apply, and we’re already noticing the difference in noise reduction!
Shopping list
2 x Side windows ( 1 x opening 1 x fixed)
1 x Universal slot window for above the bed
3 x Window fitting kits + 1 extra tube of bonding
Back seats, rails and bolts from Commercial Van Seating Specialist
Deadsound SD Sheets
Deadsound Thermal SD
Pilot holes to cut round
Dad helping remove the first piece
Ember showing us where the seats will be
Seats in situ

Shopping for supplies

Peek-a-boo!
Stage four: Floor
When installing the floor, we wanted to avoid drilling more holes in the van than necessary, so we used Sikaflex to glue the battens down. We opted for treated roof timbers for the battens, filling the gaps with Celotex insulation and sealing the joins with foil tape. We also strategically placed the battens where we plan to install interior storage and the bed, ensuring we’ll have a solid foundation to fix those pieces when the time comes.
For the top layer, we reused the plywood floor that originally came with the van, laying vinyl tiles over it. Although vinyl tiles are heavier than linoleum or standard laminate, they’re extremely durable and waterproof—ideal for a work van and a family that enjoys water-based activities. In our previous van, we had lino flooring, but it dented and tore easily, so we opted for something more hardwearing this time around.
Shopping list
Treated roof timbers
Celotex
Foil tape
Snack break
Batons down with Celotex in between
Foil tape over all the joins for vapour barrier
Subfloor down using original ply from the van
Vinyl tile floor
Flooring finished!
Stage five: Ikea SKORVA bed hack
We know building a van takes time, but getting on the road was a priority, so our next focus was installing the bed. In our previous van, we had a slide-out bed, but it stayed in the "out" position most of the time, so for this build, we opted for a fixed bed. The benefits of a fixed bed are that it's always ready when you arrive at camp, provides more storage space in the garage area, and allows you to use standard-size frames and mattresses, keeping costs low. Plus, it's quicker and easier to build. The downside, especially in smaller vans, is losing some living space.
Fortunately, a double mattress fits perfectly across the back of our van, so we designed the bed dimensions around that. We chose Ikea SKORVA beams for the frame because they’re lightweight, easy to install, and can be lifted out later if needed. They're also adjustable, making it simple to modify the width. With the right tools, the installation should only take a couple of hours.
We used a rivet nut gun to fix the brackets in place. This was our first time using one, but it made the job quick and easy—and it’s a tool we’ll definitely use for other parts of the van. Instead of fixing the brackets directly to the van’s cross beams, we added timber to raise the bed a few extra inches for more clearance. We spaced the brackets evenly to accommodate the three SKORVA beams, which slotted neatly into place without the need for additional fixings. After spacing out the slats evenly, we screwed in a few for extra security.
Eventually, we’ll add side panels to keep the mattress from shifting, but for now, we’re road-ready with a simple and sturdy bed!
Shopping list
6 x Ikea SKORVA brackets (you can find these on ebay)
Bed slats (we just used from an old ikea bed, you can often pick up for cheap on facebook marketplace or make your own)
Rivet nut gun (Amazon)

Using the rivet nut gun to create fixings

Testing how strong the beams are (or myself rather 😅)

Beams slotted into the brackets

Voila! Looking forward to some family movie nights up here!

We used bed slats and matress from an Ikea double bed we already had
Stage six: Fitting the MaxxAir MaxxFan Deluxe
With a few days of good weather ahead, we decided it was time to install the MaxxAir MaxxFan Deluxe. Having stayed in vans equipped with this fan and hearing great reviews, we did minimal research into alternatives and chose to go for it. We opted to place it at the front of the van where the roof already had a flat surface, making it easier to cut the necessary hole. To allow for the fan's movement, we removed the front roof bar.
It's crucial to plan the entire roof layout before cutting anything, especially in an L2 van where space is limited if you also plan to install solar panels.
We followed Greg Virgoe’s method from his YouTube channel. First, we built a wooden frame and cut the hole, taping a bag inside the van to catch metal shards. After cutting, we filed the edges and applied Hammerite to protect the exposed metal. We then used mastic sealing tape to secure the frame and screwed it down, ensuring a watertight seal. To further seal the installation, we applied Sikaflex 522 around the frame and over the screw heads before assembling the top of the fan.
The installation was straightforward, though getting the measurements and location right is key—you definitely don’t want to make a mistake here!
Since installing, we've had heavy rain with no leaks, so we can confidently recommend using the mastic sealing tape method. We also re-measured the van’s height post-installation to avoid any mishaps under low bridges!
Shopping list
MaxxAir MaxxFan Deluxe (Amazon)
Sikaflex 522 sealant
Mastic Sealing tape (Amazon)
Masking tape
Hammerite
Wooden frame to fix on underside of roof
Drilling pilot holes to then cut the hole out with a jigsaw
Sticking mastic tape round the edges to screw the frame down on top
Lining things up
Wooden frame fixed with Sikaflex and the fan frame screwed down into it from the top
Sealing the edges and screwholes before popping on the lid
Stage 7: Installing solar panels and insulation
With the Maxxfan installed, the next step was to tackle the solar panels. After reviewing several options, we decided on the Victron Energy 175W-12V Mono Solar Panels (1485x668x30mm, series 4a). These panels offered the perfect width and allowed us to install one on each side of the roof bars. The installation process was smooth and took just a day to complete.
Before moving on to roof insulation, we tested for leaks around the mounting brackets where the panels were secured. For insulation, we used Deadsound Thermal SD, which has a convenient adhesive backing. When we start battening out the van, we’ll add a layer of Celotex along with recycled fleece insulation to ensure optimal warmth and energy efficiency.
Shopping list
2 x Victron Energy Solar Panel 175W-12V Mono 1485x668x30mm
Deadsound Thermal SD

Checking the panels over - make sure you do this with any deliveries as soon as they arrive if you are going to be storing them for a bit!

Laying everything out to double check positioning
Stage 8: Diesel heater
When researching diesel heater options, we noticed a wide price range between budget and premium models. After weighing the reviews, we aimed to strike a balance between quality, cost, and how often we’d actually use it. We settled on the Autoterm 2KW 2D, which seemed perfect for making our van usable year-round.
We opted to mount the heater under the driver’s seat, an area that would otherwise go unused. This location also allowed us to tap directly into the van's fuel tank, saving us from having to install a separate tank and taking up valuable space. For added convenience, we upgraded to the comfort controller, which has a digital display and automatically adjusts when the temperature drops. However, the standard cable it came with was too short, so we purchased an extension cable to mount the controller near the bed. Now we can easily turn up the heat on chilly mornings without leaving the warmth of our blankets!
Removing the driver’s seat made access much easier, as some parts of the installation were a bit tricky. To avoid the risk of draining the fuel tank, we connected the fuel line to the bottom of the tank. Eventually, we'll box in the front section and run the ducting out the front to distribute the heat down the center of the van. We’re excited to stay cozy during winter trips and enjoy the van all year long!
Shopping list
Autoterm 2KW 2D from Bobil vans
Comfort controller
Cable extension for comfort controller


Diesel heater location under drivers seat

It works!
Stage 9: Electrics
This was the part of the build we’d been dreading the most. To give ourselves enough time to tackle the electrical system, we set aside an entire week to focus on the job. We used Tiny Build Electrics to design a setup tailored to our needs. They provided all the necessary parts and a detailed wiring diagram, saving us hours of research and guesswork. They also have a WhatsApp community which proved to be helpful for questions along the way.
Our plan was to install the electrical system in the van's "garage" area, over the wheel arch. However, we quickly realised there wasn’t enough space for all the components. To solve this, we mounted some pieces on the back of what will become the box seat divider between the bed and the rest of the van, which ended up working out perfectly as this would have otherwise been dead space.
We started by cutting a board to size and laying out all the parts to visualise how they would fit. It took some time to familiarise ourselves with the various components and arrange them in a logical order for wiring. For added safety, we used aluminum plates behind critical units like the SmartSolar charge controller, DC/DC charger, and Lynx Power In units.
Once everything was laid out, we secured the components and connected them all together before mounting the board in the van, which made the wiring process much easier.
Shopping list
Tiny Build Electrical system
18mm Ply boards
Aluminium plates

Planning out our board

Both boards in place (will eventually build a cupboard)

Fixing components in place

Well earned piece of cake
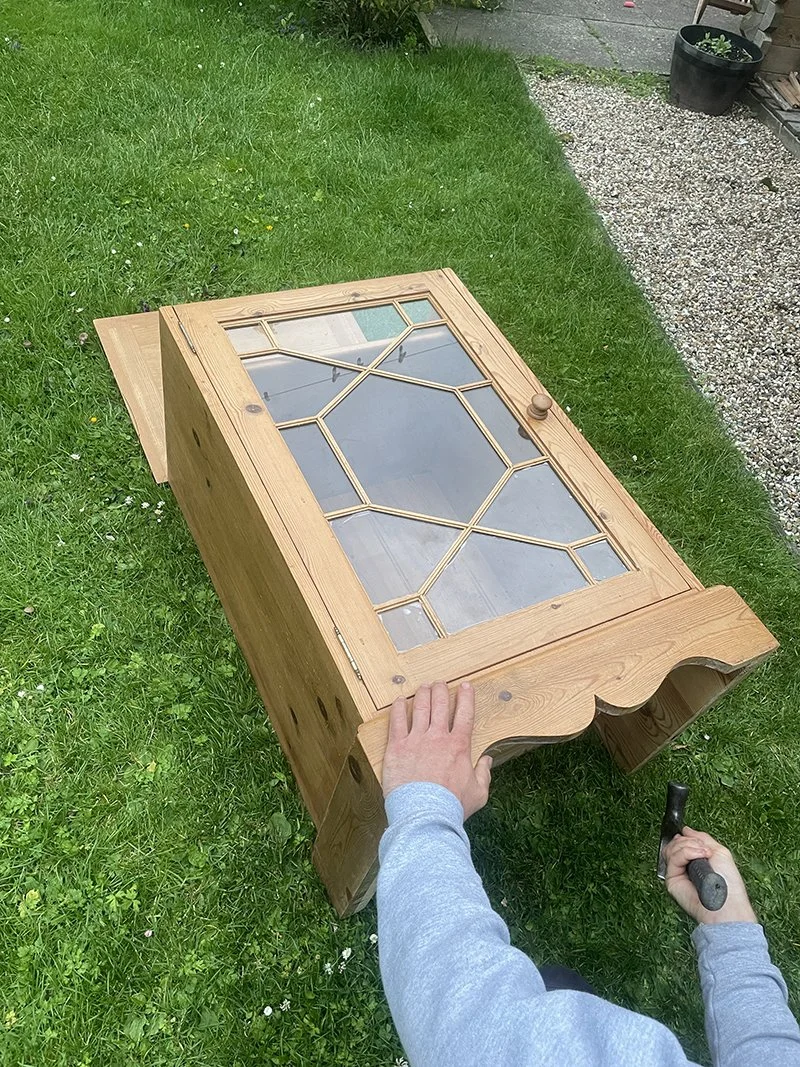
Stage 10: Kitchen Cabinet
We spent a lot of time debating how we wanted our van kitchen to function. Our priorities were clear: we wanted to cook both inside and out, have a clear, uninterrupted worktop (so no built-in hob), a flip-up counter to maximise prep space, and—crucially—the entire unit needed to be removable for when the van is used for work and we need the extra floor space.
This cabinet also became our opportunity to add a splash of colour and personality to the van. While most of the interior is light and bright to complement the exposed metal and create a sense of space, we wanted the kitchen area to feel playful and warm.
We picked up an old but solid cabinet from the local recycling centre for £5 to use as the base. We removed the original glass door and replaced it with two new doors to improve access in the tight van space. The old flip-up lid was swapped out for a solid oak worktop sourced from Facebook Marketplace and we mounted a flip up counter with rounded edges on heavy-duty folding brackets from Amazon to make it more compact and user-friendly. We added a small plinth and carpeted the underside to make it easy to slide in and out without damaging the floor.
Because the kitchen sits by the sliding door and is often exposed to the elements, we treated the oak top with several coats of Danish oil. For the sides, we used waterproof reeded panelling from Nature Wall to create a fun finish. They can be used as they are but we gave them a light sand, primed, and painted them in a cheerful yellow that carries through to the lower part of the sliding door for a cohesive look.
Inside, the cabinet has two shelves where we store dry food, utensils, and cooking essentials in plastic storage boxes and a cutlery tray. It also houses a fire extinguisher, with a fire blanket stored elsewhere in the van for easy access.
What we’d do differently: If we’d found a thinner worktop on Facebook Marketplace, we would have used that to reduce weight and make the unit easier to move (it is quite heavy as it’s all solid wood). We also considered adding a backsplash from offcuts but opted against it to keep the weight down and maximise workspace.
Overall, we’re really happy with how this unit turned out—it’s practical, colourful, and completely in tune with our flexible van lifestyle.
Shopping list
Base cabinet + extra pine for doors / plinth
Oak worktop (from Facebook Marketplace)
Danish Oil (Sourced from Dunelm)
Extendable kitchen worktop brackets (Amazon)
Ronseal All Surface Primer
Valspar ‘Garden colours’ tester paint (yellow)
Removing the decorative plinth, lid and door from base cabinet.

Making the doors

Making a template for the worktop

Danish oil going on the worktops

All surface primer, ideal for painting the waterproof panels

Reeded panels all painted with a Valspar garden tested pot

Sticking the panels on with…you guessed it - Sikaflex!

Brackets for extended worktop

Fixing everything together
Stage 11: Framing out the rest of the van and creating niches
While we’d already framed out a few key areas during earlier stages—like around the bed—it was finally time to finish framing the rest of the van and add those thoughtful little touches that make the space feel more like home and accommodate books/maps etc.
We started with the windows. Our daughter was keen to get involved in this stage (it’s wild how much she’s grown since we first started the build!). Although we dreamed of creating beautifully curved window frames, we decided to keep things simple with straight edges to avoid extending the project timeline.
We also added a few custom-built niches to maximise storage and add character:
By the rear passenger seat, we built a recessed niche perfect for storing kids’ books and small toys. To finish it off, we added a wooden frame from Dunelm (removed the glass and backing), which gave it a nice finish without having to do any extra DIY.
Next to the bed, we built a tall, vertical niche designed to hold our OS maps and Wild Guide books—perfect for evening trip planning or a bit of bedtime reading. The lower portion of this niche also cleverly conceals some electrical conduit and gave us a place to mount components that couldn’t fit on the main electrical board above the wheel arch.
For drinks holders, we got creative and repurposed enamel mugs, cut off the handles, and inset them into small wooden mounts. It’s a fun, practical detail we love—and the yellow rim ties in perfectly with the rest of our colour scheme.
These small additions have made a big difference to the functionality and feel of the van, adding both storage and personality in a way that fits seamlessly into our layout.
Shopping list
Wood battens for framing out (various sizes)
Tongue and groove cladding from Wickes
Enamel mugs
Frame from Dunelm for niche trim

Little helper

Framing out the windows

Prep for niches

Framing out the passenger window and book niches

Book niche progress - This also hides the electrics

Book niche by rear passenger seat - touching up the panels too

Enamel cup holders
Stage 12: Cladding the ceiling and walls
While we had already done some cladding in specific areas earlier on, this was the stage where we fully committed to cladding the entire interior (and where it all starts to come together!!). We chose tongue and groove panels—our go-to from a previous build—because they’re flexible enough to bend around curves and awkward shapes, which makes them ideal for van interiors.
For the finish, we wanted to strike a balance between practicality and aesthetic. We used a clear matt varnish on the ceiling to let the natural wood show through and add warmth to the space. For the walls, we went with an off-white exterior satinwood paint. We know white isn't the most forgiving colour for a family-and-work van combo, but it helped keep the space bright, open, and seamless—especially with the original white metal doors that we chose not to carpet. To make it as durable as possible, we sealed both sides of each panel before fitting them.
A key tip: We painted all the slats before installation to avoid paint clogging the grooves, which can crack and look messy over time with the van’s movement. We were really glad we did this—it gave us a much cleaner, more professional finish that only needed a few touch-ups at the end.
Harri’s precision cutting and scribing skills were put to the test around all the fiddly bits, and although it was time-consuming, the result was well worth it.
Shopping list
Tongue and groove cladding from Wickes
Valspar exterior satinwood paint (soft wool)
Ronseal crystal clear outdoor varnish (clear matt)

Working our way from the top down

Adding an extra layer of recycled fleece insulation over the Celotex as we go

Matt varnish for the ceiling

Paint for the walls

Travelling in between building
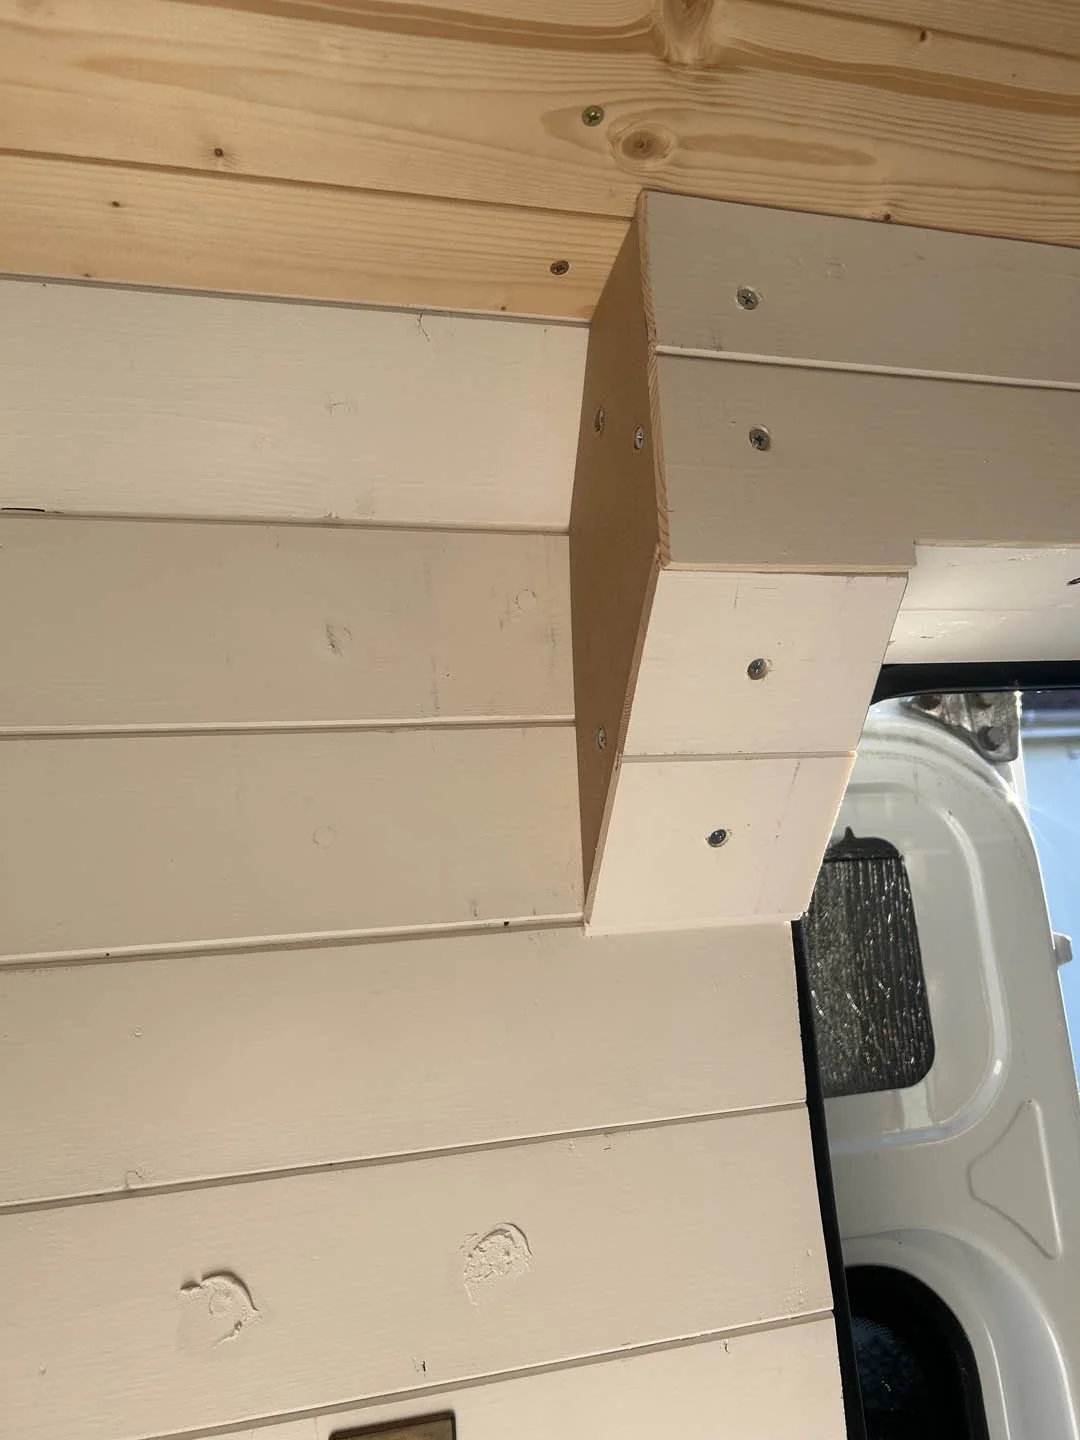
Stage 13: Overhead storage + bulkhead
We tackled the overhead storage and bulkhead area at the same time. Originally, the van came with a solid bulkhead, but we removed it early on in the build to create a more open feel—especially important since we added rear passenger seats. Eventually, we’ll add swivel bases to the front seats or swap them for captain chairs, but for now, we’ve simply removed the middle seat headrest. No one travels in that spot, and it gives us room to pass the car seat through to the front when switching into “night mode” and setting up our little one’s bed.
The existing bulkhead tray was a bonus—we kept it in place, insulated all the bear metal with sound-deadening material, and finished it with carpet to improve both the look and thermal performance of the space.
For the overhead storage above the rear seats, we wanted to maximise functionality without making the space feel cramped. We built this unit in situ as we needed to work with the curvature of the van. We decided it would be for our clothes and toiletries, so we built it with two doors for easy access. We struck gold when we discovered that IKEA SKUBB storage boxes fit perfectly—one of those unexpectedly satisfying moments that makes organisation a breeze.
On the side of the unit facing the bed, we added a small shelf for essentials like a phone, charging port, and the diesel heater controls—so we can adjust the heat from bed without braving the cold!
We also boxed in the area where the diesel heater vent sits between the front seats. Originally, we planned to turn this into a small storage box, but once we started building it out, we realised it was better left closed. There were some wires routed inside, and realistically, it would’ve just become a dumping ground for odds and ends that would end up getting quite hot. Instead, we fixed the lid in place and added a sunken enamel mug as a cup holder—a simple, functional touch that ties in nicely with the rest of our design.
A key tip: It’s worth getting proper stay-open hinges. We tested a few options, but many either wouldn’t stay up at all or slowly drooped shut. Having doors that stay open hands-free is a game changer when packing the van—no more trying to hold them up with your head while packing the van.
Shopping list

Frame for overhead storage

Using the van as a shed!

Boxing in the front seats and diesel heater


Another trip to Wickes!

Finished storage and bulkhead
Stage 14: Toddler bed
Designing a toddler bed in a compact campervan took a bit of trial and error—and a few trips on the road to really figure out what worked best for us. When our little one was still in an infant car seat, we kept things simple and used a pop-up travel cot. But once she transitioned to a toddler seat in the back, we knew we needed a more permanent solution that could transform into a bed during ‘night mode’ while still leaving us with enough floor space to move around.
After exploring several ideas, we settled on a layout that does require moving the car seat to the front each night to fold the rear seat down—but the setup works well and makes good use of the space.
For the mattress, we use three IKEA FRÖSÖN/DUVHOLMEN outdoor seat cushions. They're affordable, hard-wearing, water-resistant, and the covers are removable and washable (plus, they’re available in grey if you prefer a darker tone). We stack two on the box seat behind the passenger seat during the day, and store the third cushion, along with the bedding and bed guard, in the overhead storage above the cab.
To keep the bed safe and secure, we sourced the Dreambaby XL bed guard—the longest we could find to span most of the bed area. It folds down easily when not in use, so the bench can still function as a seat during the day. Since standard strapping didn’t suit our setup, we removed it and replaced it with two custom fixing points. These are secured with bolts each night and removed in the morning.
Safety notes: If your toddler’s bed is near a window, be sure to use cordless blinds and install a proper bed guard to keep things safe.
Shopping list

Early days storing the travel cot under the bed to pull out at night

Great set up for mid conversion

Lots of late night testing and prototypes

What a view to wake up to!

So happy with her little cozy corner

The bed in bench mode
Stage 15: Back doors
We wanted the back doors to be more than just functional—so we turned them into a fun and practical space by adding chalkboards for our little one to play with. We started by insulating the door cavities using a combination of Celotex and recycled fleece, then reused the original plywood panels that came with the van.
For the chalkboard sections on the lower half, we used Rustins blackboard paint—super easy to apply and only needed a few coats to get a smooth, matte finish. The upper panels were clad in leftover tongue and groove from the rest of the build, painted in white to seamlessly match the van’s overall look. To help weatherproof them, we sealed the edges with clear silicone to prevent water ingress when the doors are opened in the rain.
To finish off the area, we carpeted over the exposed IKEA SKORVA bed beam and also carpeted the custom panel we built to close in the head end of the bed. A hook on the back of the door holds the bag for our thermal blinds, keeping it easy to grab at night.
For a touch of privacy and softness, we added semi-sheer curtains across the top of the rear doors using curtain wire. We chose the Marley linen-look curtains from Dunelm, removed the tabs and buttons, and threaded the wire through the existing seam for a tidy, tailored finish. They let in light while still giving enough privacy when the back is open and we’re reaching in for gear and make it feel homey inside so we are not just looking at the doors when hanging out on the bed.
Shopping list
Celotex / Recycled fleece insulation
Rustins Blackboard paint (Toolstation)
Plywood (came with the van)
Tongue and Groove (Wickes)
Clear silicone

Insulating all the cavities

Carpeting the rear panels

Rustins Blackboard paint

Chalkboard doors

Finished garage area and doors
Stage 16: Those awkward bits
We definitely saved the worst until last. These are the jobs that, if you don’t tackle them at the end of the build, will almost certainly stay unfinished forever.
The trickiest area was the space above the sliding door. With multiple angles and odd shapes, it took a lot of head-scratching to work out the best way to deal with it. We built a timber frame, insulated all the gaps, and made use of two existing D-rings (originally part of the van floor) to create strong fixing points for a swing or hammock for little ones that can be used when the sliding door is open.
Once the frame was in, we clad over most of it and used a small piece of stretch carpet to cover the final exposed corner. It wasn’t the easiest job, but we were really happy with how it turned out and it doesn’t intrude on our living space.
We then tackled the area above the rear doors, along with a few other small finishing jobs that had been lingering. One of these was a piece of timber that stuck out into the bulkhead storage. To soften it and remove any sharp edges, we made a ply template and covered it with carpet. It not only made the area safer but also helped tidy up the overall look by hiding the timber battens underneath.
Not the most exciting stage of the build, but definitely one of the most satisfying once it was done.

The bit above the sliding door that has all kinds of angles!
Boxing in the protruding metal

Carpet on the small piece of metal left

Added some coat / dog lead hooks

Tether points to hand swing / hammock

Before

After
Stage 17: Finishing touches
The day i’ve been waiting for! Ever since we bought the van, I’d been dreaming up ways to make it feel like a home. Over time we’d collected bits and bobs to add personality to our conversion project. We added hooks for coats, hung frames with pictures from our adventures, added books to the nooks, made curtains and added plenty of pillows to make it comfy. (Harri thought he was escaping all the pillows on our bed at home - turns out plenty of them ended up in the van too!)
There were a few holes left in the sliding door from the original ply lining. We painted over them to prevent rust, filled them with a small dab of Sikaflex, and finished them off with drill hole cover caps for a neat result.
Shopping list
A full list of everything we used from IKEA and how we organised it all is coming soon.
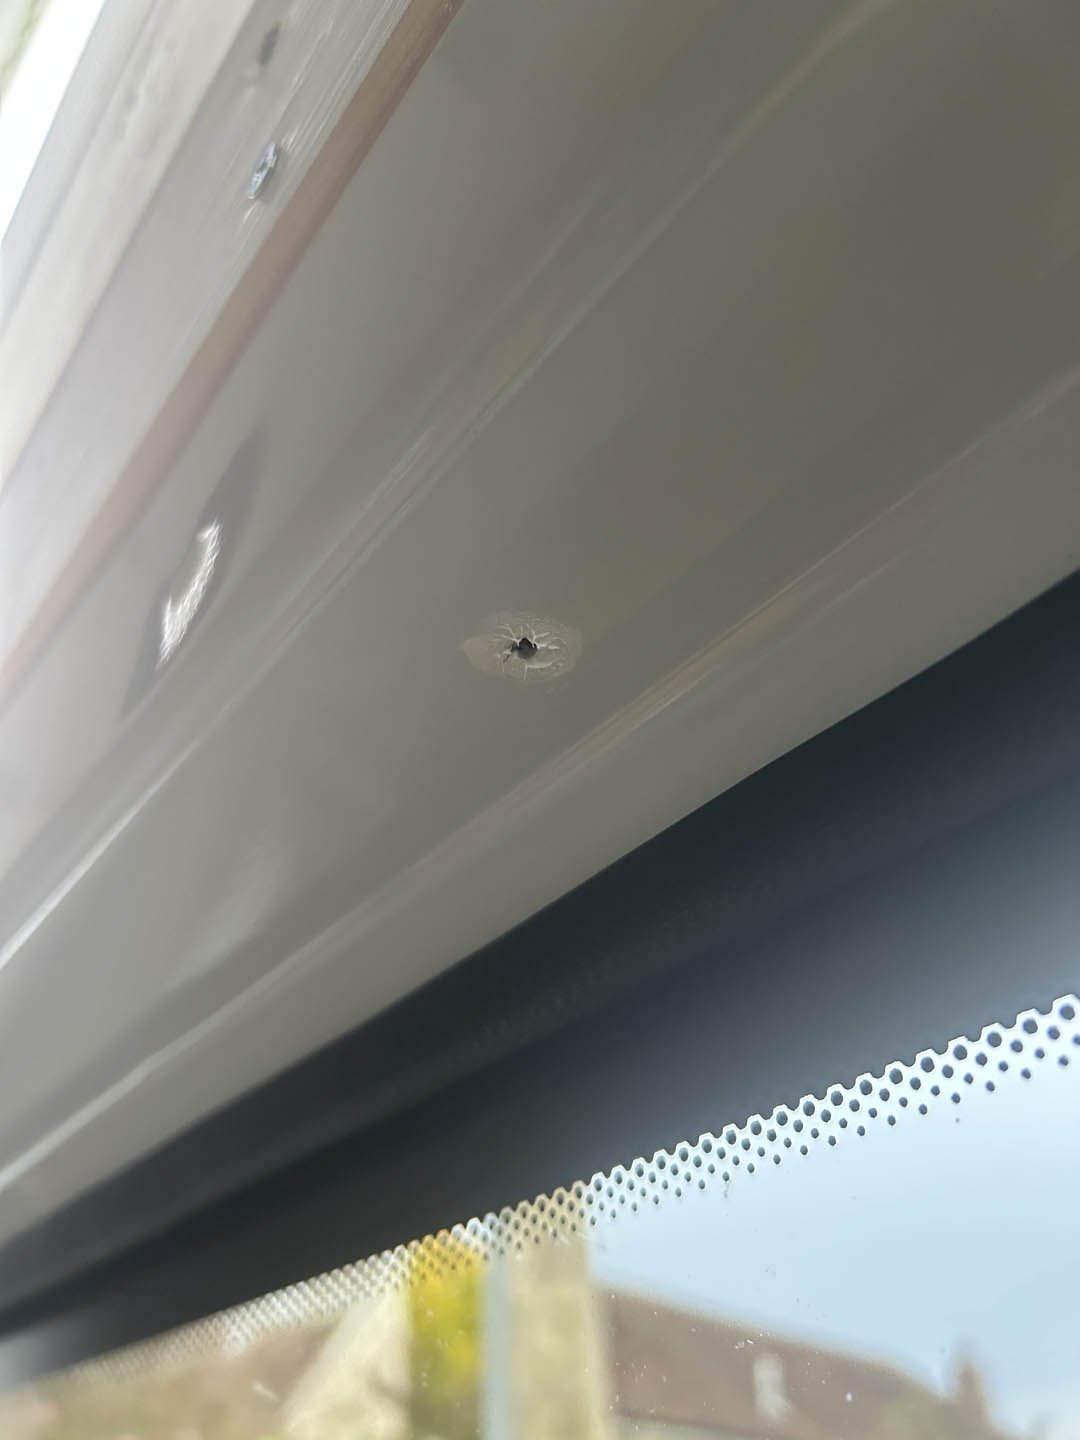
Paint then Sikaflex on holes

Drill hole caps

Much better!


Stage 18: New Baby bed addition
We built this van with a family of four (plus the dog) in mind. We added extra studwork behind the cladding, with the hope that one day we’d be able to build a bed for another little one.
A couple of years later, our little rainbow arrived and we began planning our next chapter of adventures. For the first trips, we kept things simple: a Moses basket on the main bed for Bonnie, and Harri sleeping on a bed chair underneath. As we didn’t need much garage space at that stage, this worked well and bought us some time to design and build a more permanent setup.
We eventually added a baby bed using a SnuzPod 4 bassinet (the narrowest option available from the brand) and built a simple custom frame for it to sit on. We wanted the area to feel light and bright and not like a botched afterthought, so we chose a white SnuzPod and painted the frame white to match. Positioning was key - we needed enough clearance underneath for our feet, while keeping it low enough to make lifting her in and out easy. There’s definitely a fine line there! This set up also allows us to take out the bassinet into bricks and mortar accommodation if needed.
We also managed to squeeze in a small shelf, which is perfect for storing Flo’s bedding when it’s not in use. The bed guard for Flo’s bed tucks away neatly underneath too, helping keep the van organised when we’re on the move.
Once Bonnie outgrows this setup, we’ll likely build something more permanent across that wall using the studwork we installed earlier. For now though, this solution works perfectly for our family and the stage we’re in.
Shopping list
Snuzpod 4 baby bassinet
Timber for frame and shelf
Our finished van in pictures
Click on the images to make larger


What has helped us with our camper van build
Tiny Build Electrics
We worked with Tom at Tiny Build Electrics to come up with a plan of action for the electrical system. He created us a diagram to work from and ordered and sent all the parts we needed to carry out this part of the build. This saved us a lot of time on research and we had a WhatsApp group chat to ask any questions that came up as we were working on adding the components.Quirky Campers
Although this is a buy and sell website for camper vans. It’s been an amazing source of inspiration particularly for multiple passenger vans as it’s easy to filter by size and type of van.Youtube / Instagram in particular Greg Virgoe’s channel
Facebook Groups like Peugeot Boxer Relay & Ducato Camper van build and Peugeot Boxer campervan conversion
