Adventure crafts for little explorers
We’re always looking for simple, low-cost ways to entertain our toddler while still getting outdoors and making the most of nature. These easy crafts combine a bit of creativity at home with natural finds collected on dog walks or family adventures. Perfect for preschoolers with a little help from grown-ups, they’re a fun way to spark imagination, explore textures, and enjoy the outdoors in any season.
Toilet roll binoculars
Turn two toilet roll tubes into a pair of DIY binoculars. Ideal for turning an ordinary walk into a nature-spotting adventure. Once made, we headed out to look for birds in trees, tractors in fields, and anything else our little explorer could find through her new lenses.
Materials
2 toilet roll tubes
String or ribbon
Hot glue gun or PVA glue
Decorations: paint, stickers, crayons, buttons - anything goes

Looking for tractors
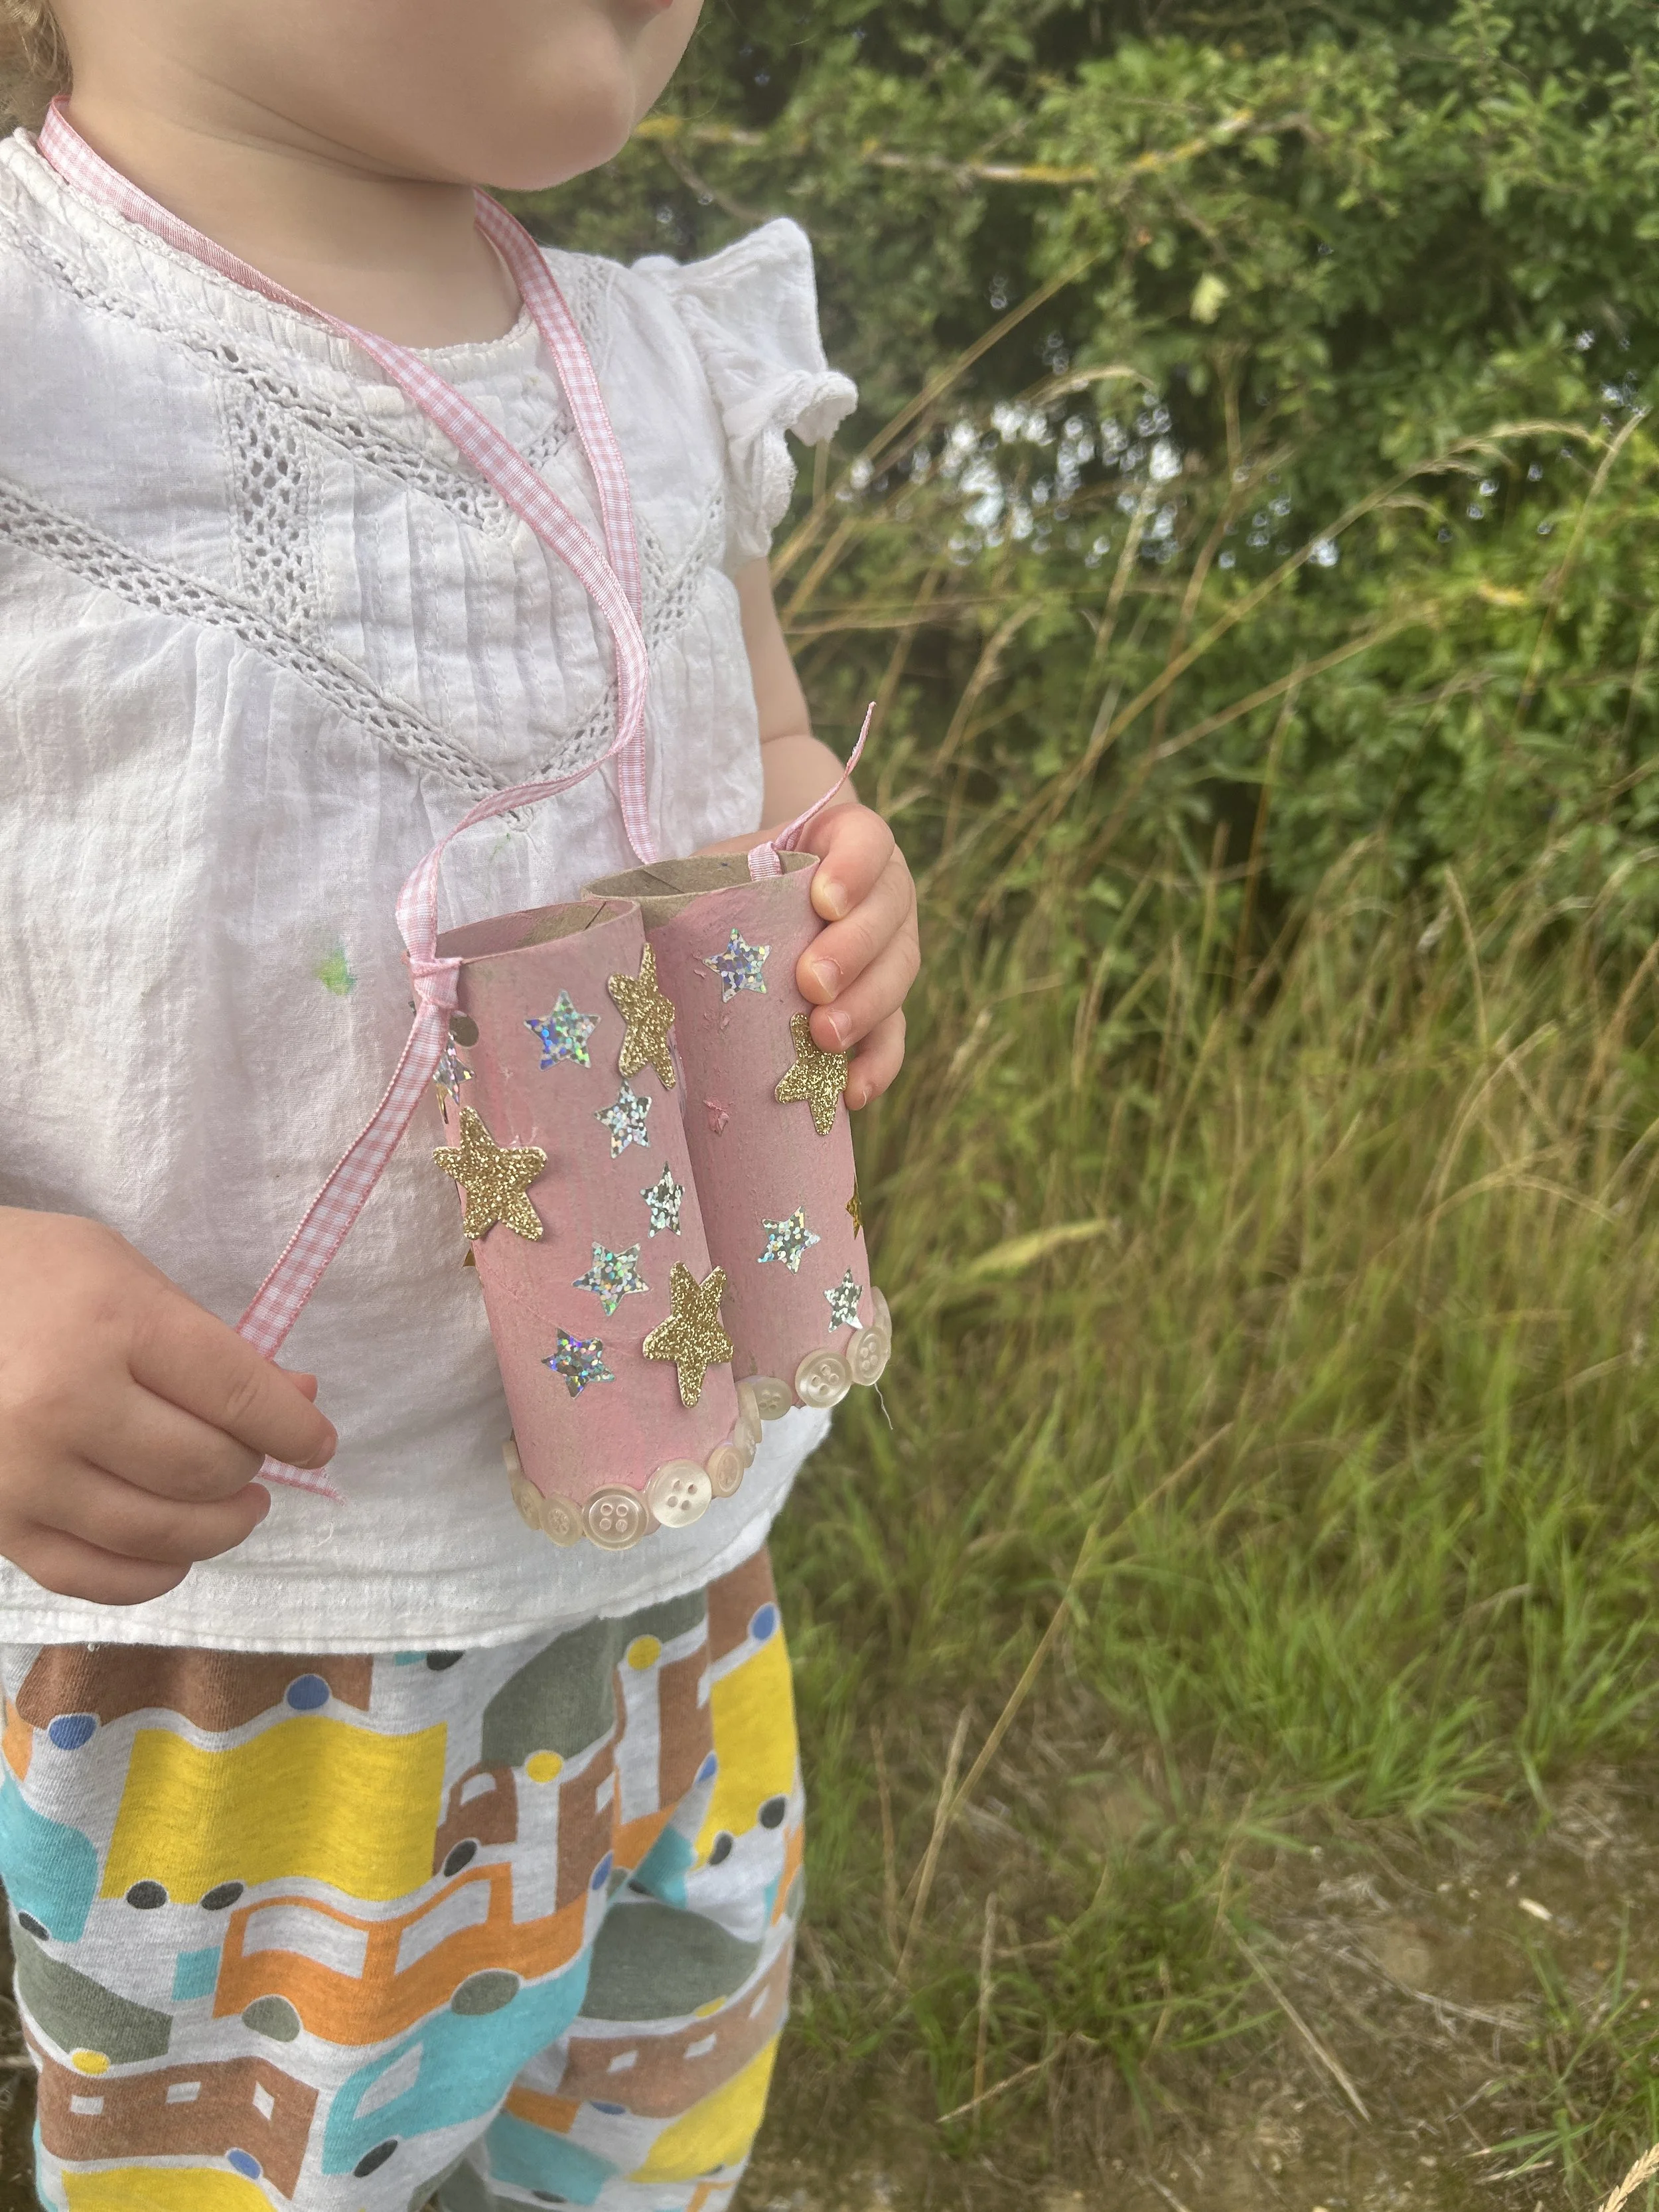
Of course Flo’s had a pink base!
Fire painting
Using simple materials and a bit of imagination, kids can create their own “campfire” artwork. Collect a handful of small sticks on a walk and arrange on a piece of card to be the base of the fire – you can also use a hot glue gun to stick them down if you plan on pinning their artwork up afterwards. Then mix red and yellow paint with a splash of water, drop puddles at the base, and use a straw to blow the paint upwards into flame shapes. Tilting the paper works well for younger toddlers too.
Materials
Card or thick paper (the back of a cereal box works well)
Red and yellow paint (watered down slightly)
A straw
Sticks from outside

Using a straw to spread the paint

Tipping the card to spread the paint
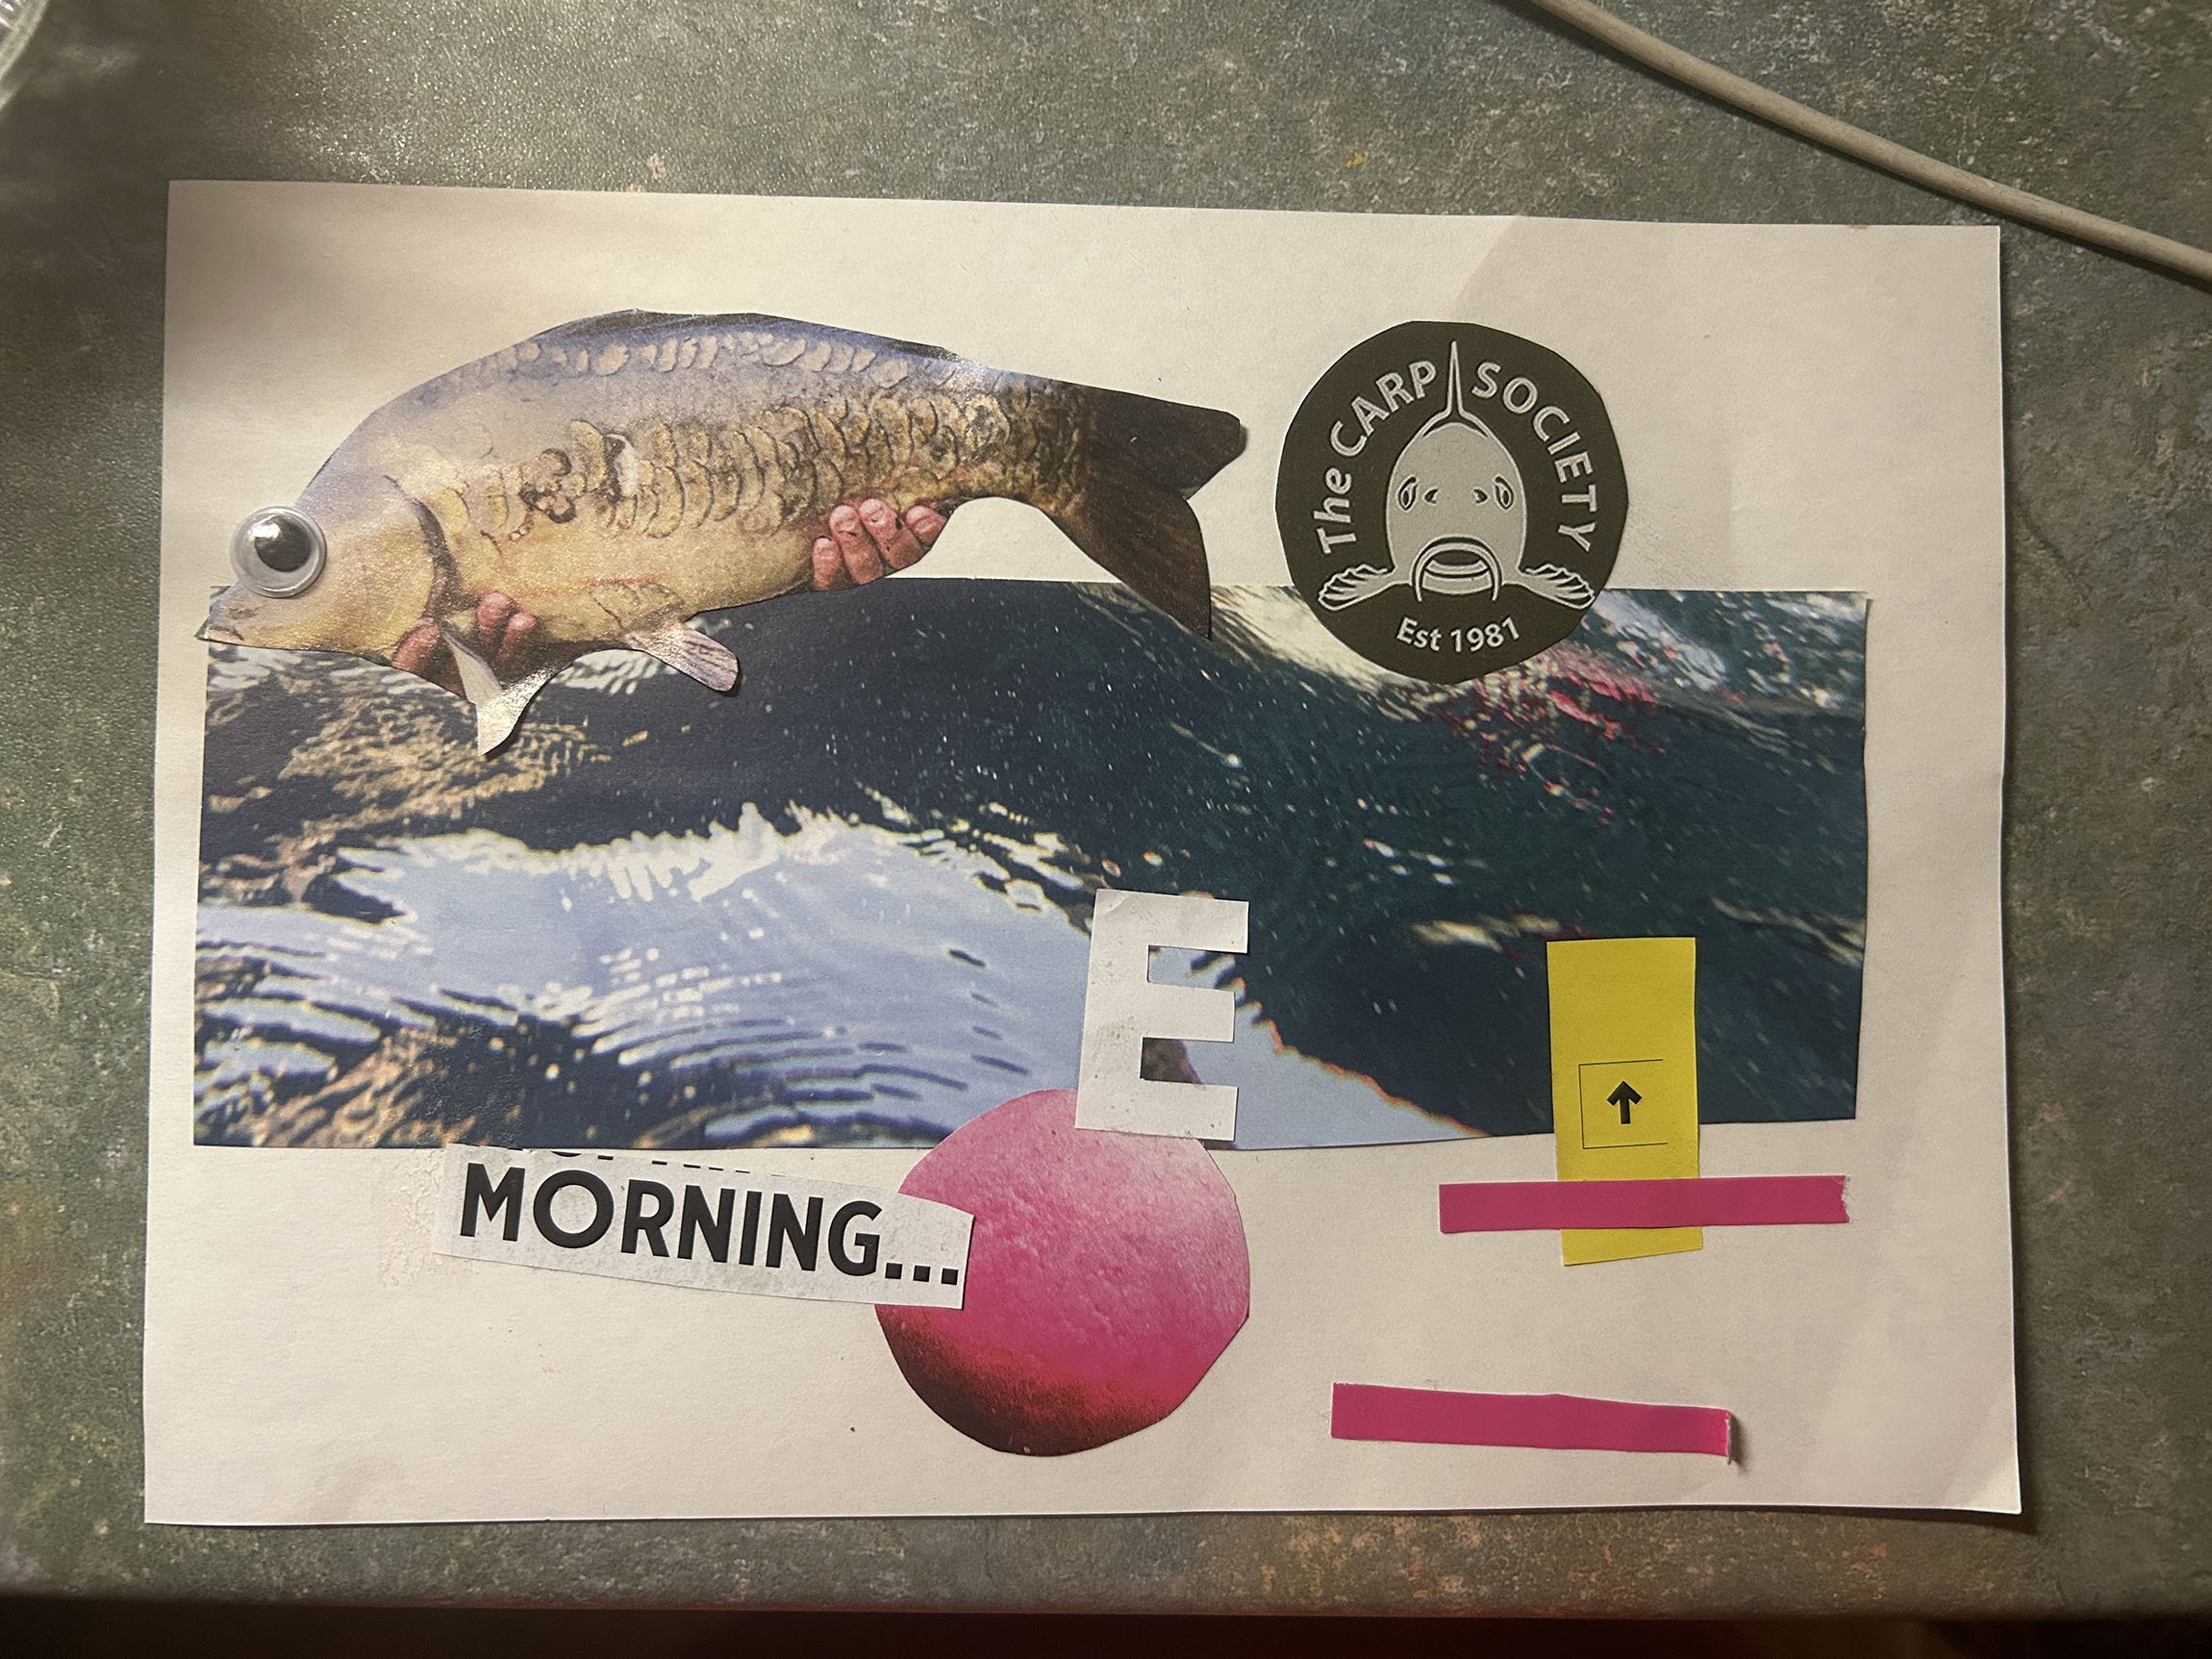
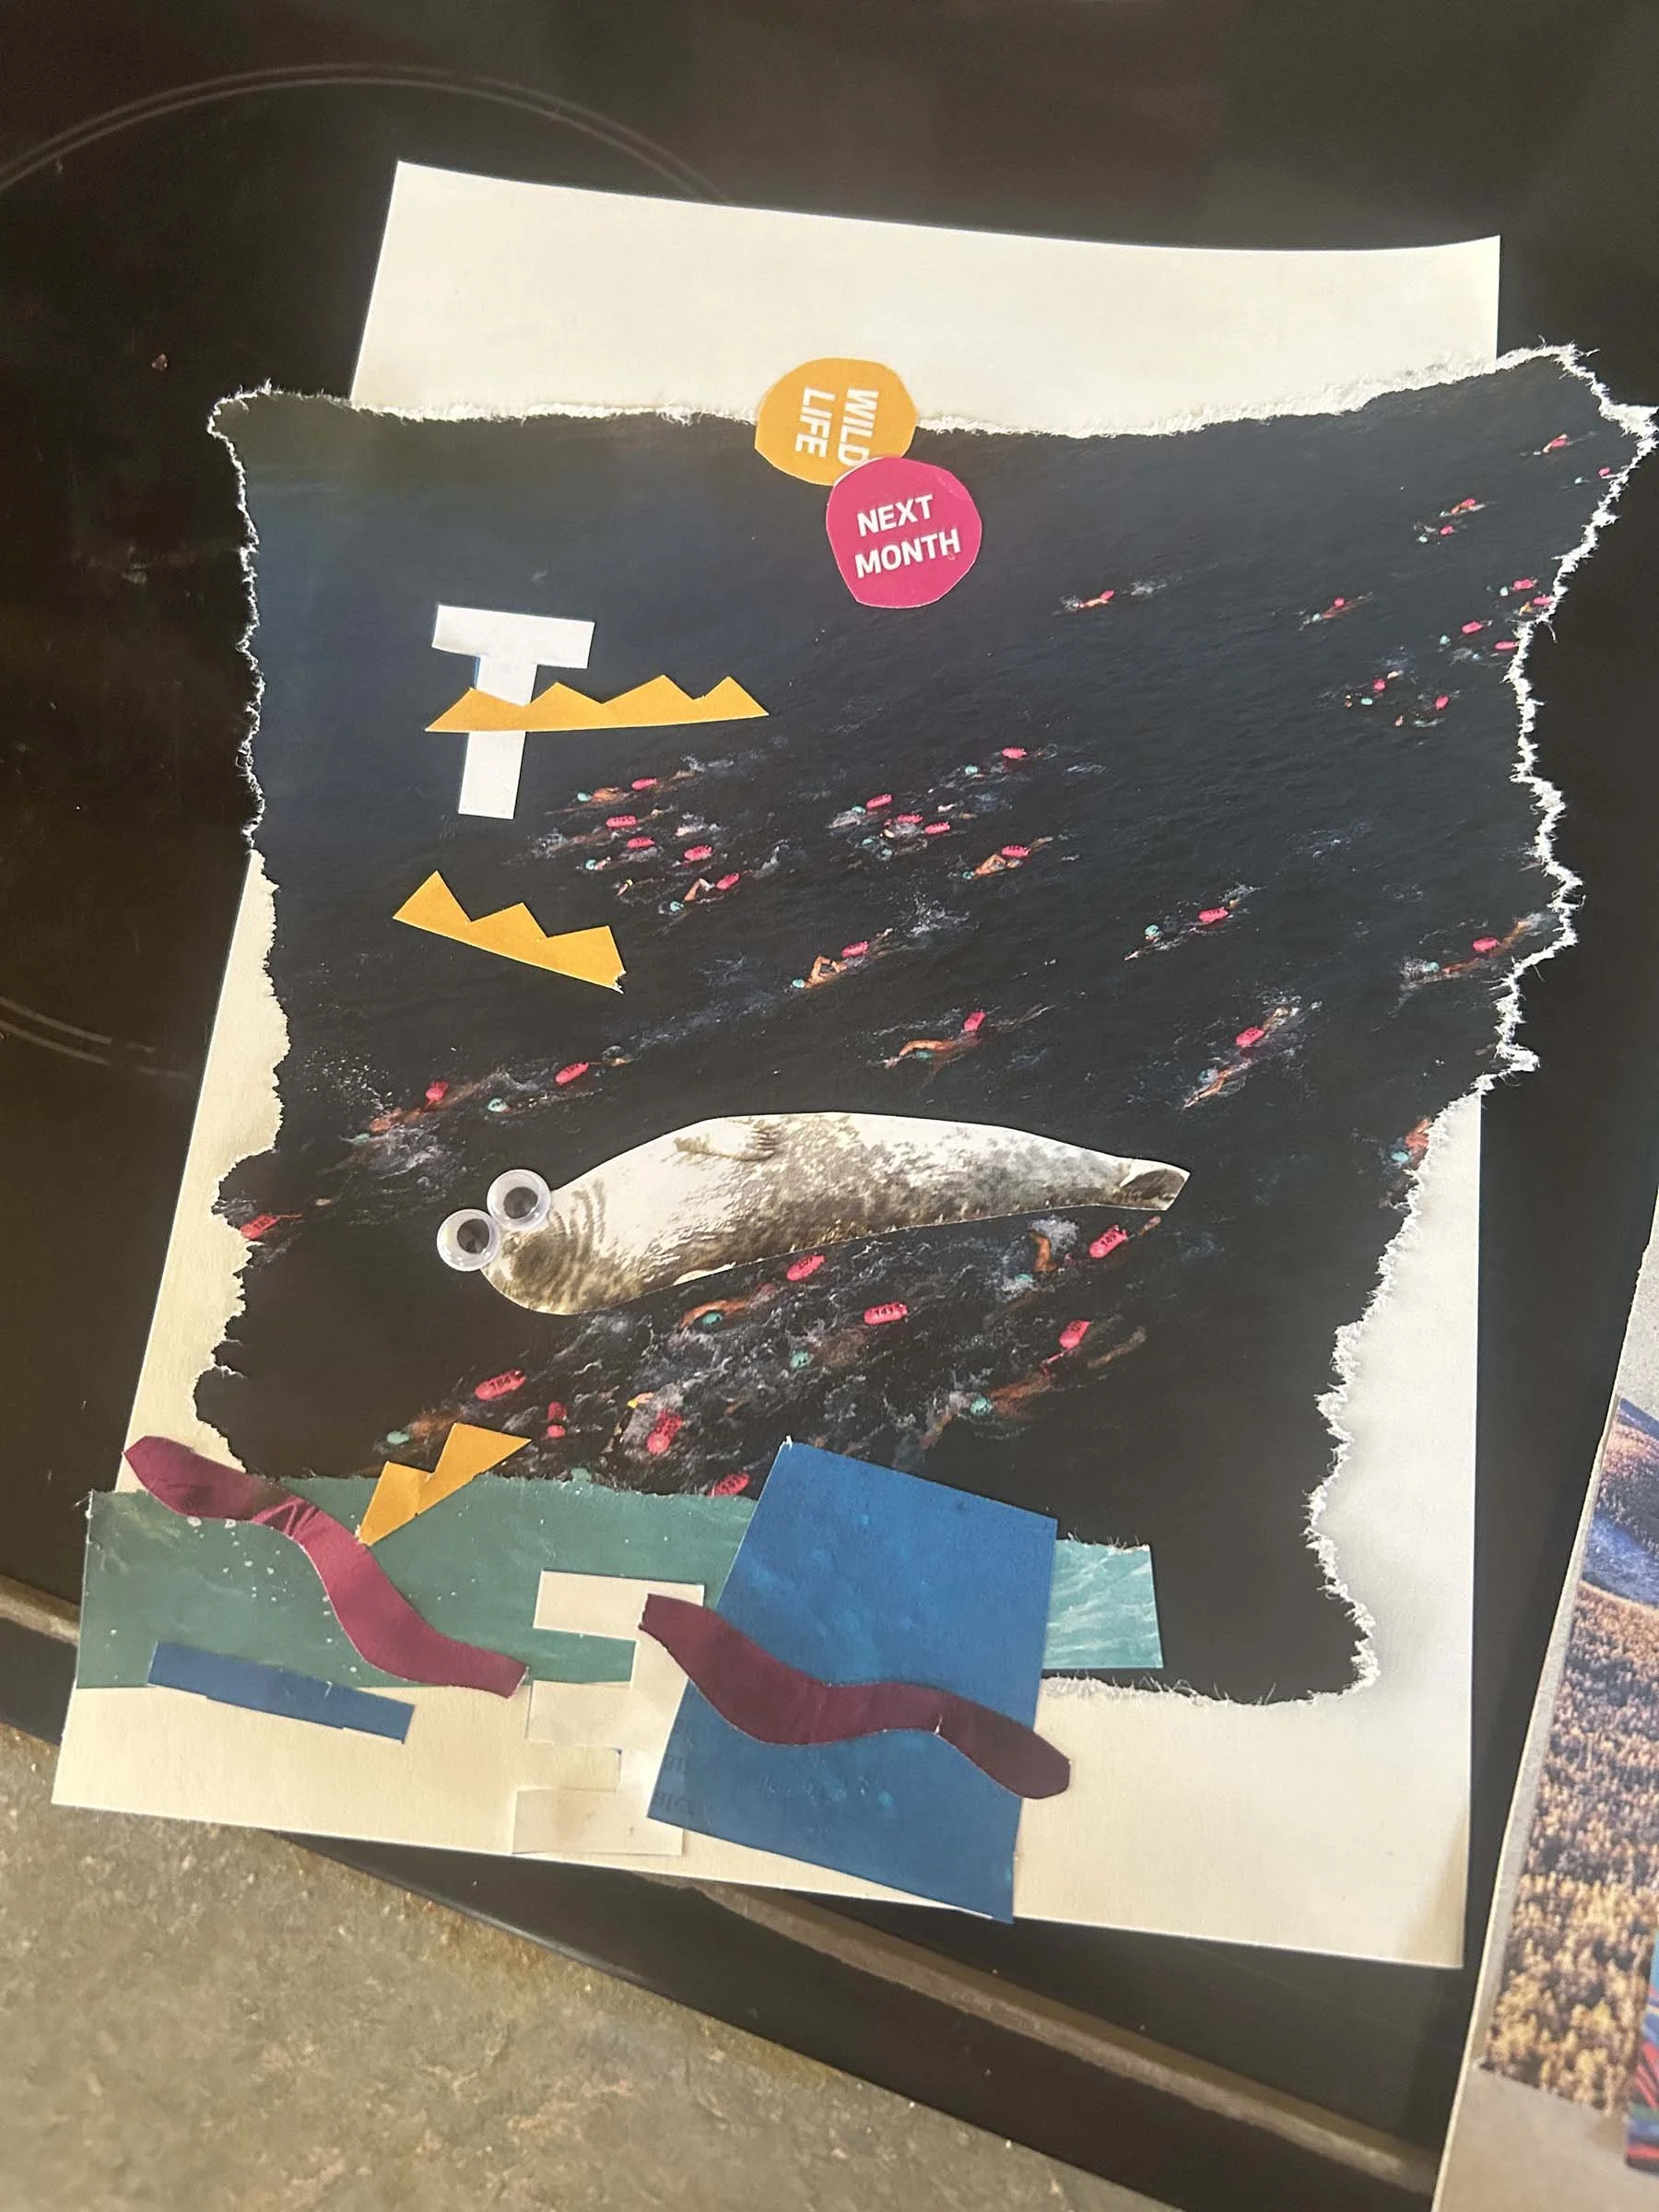
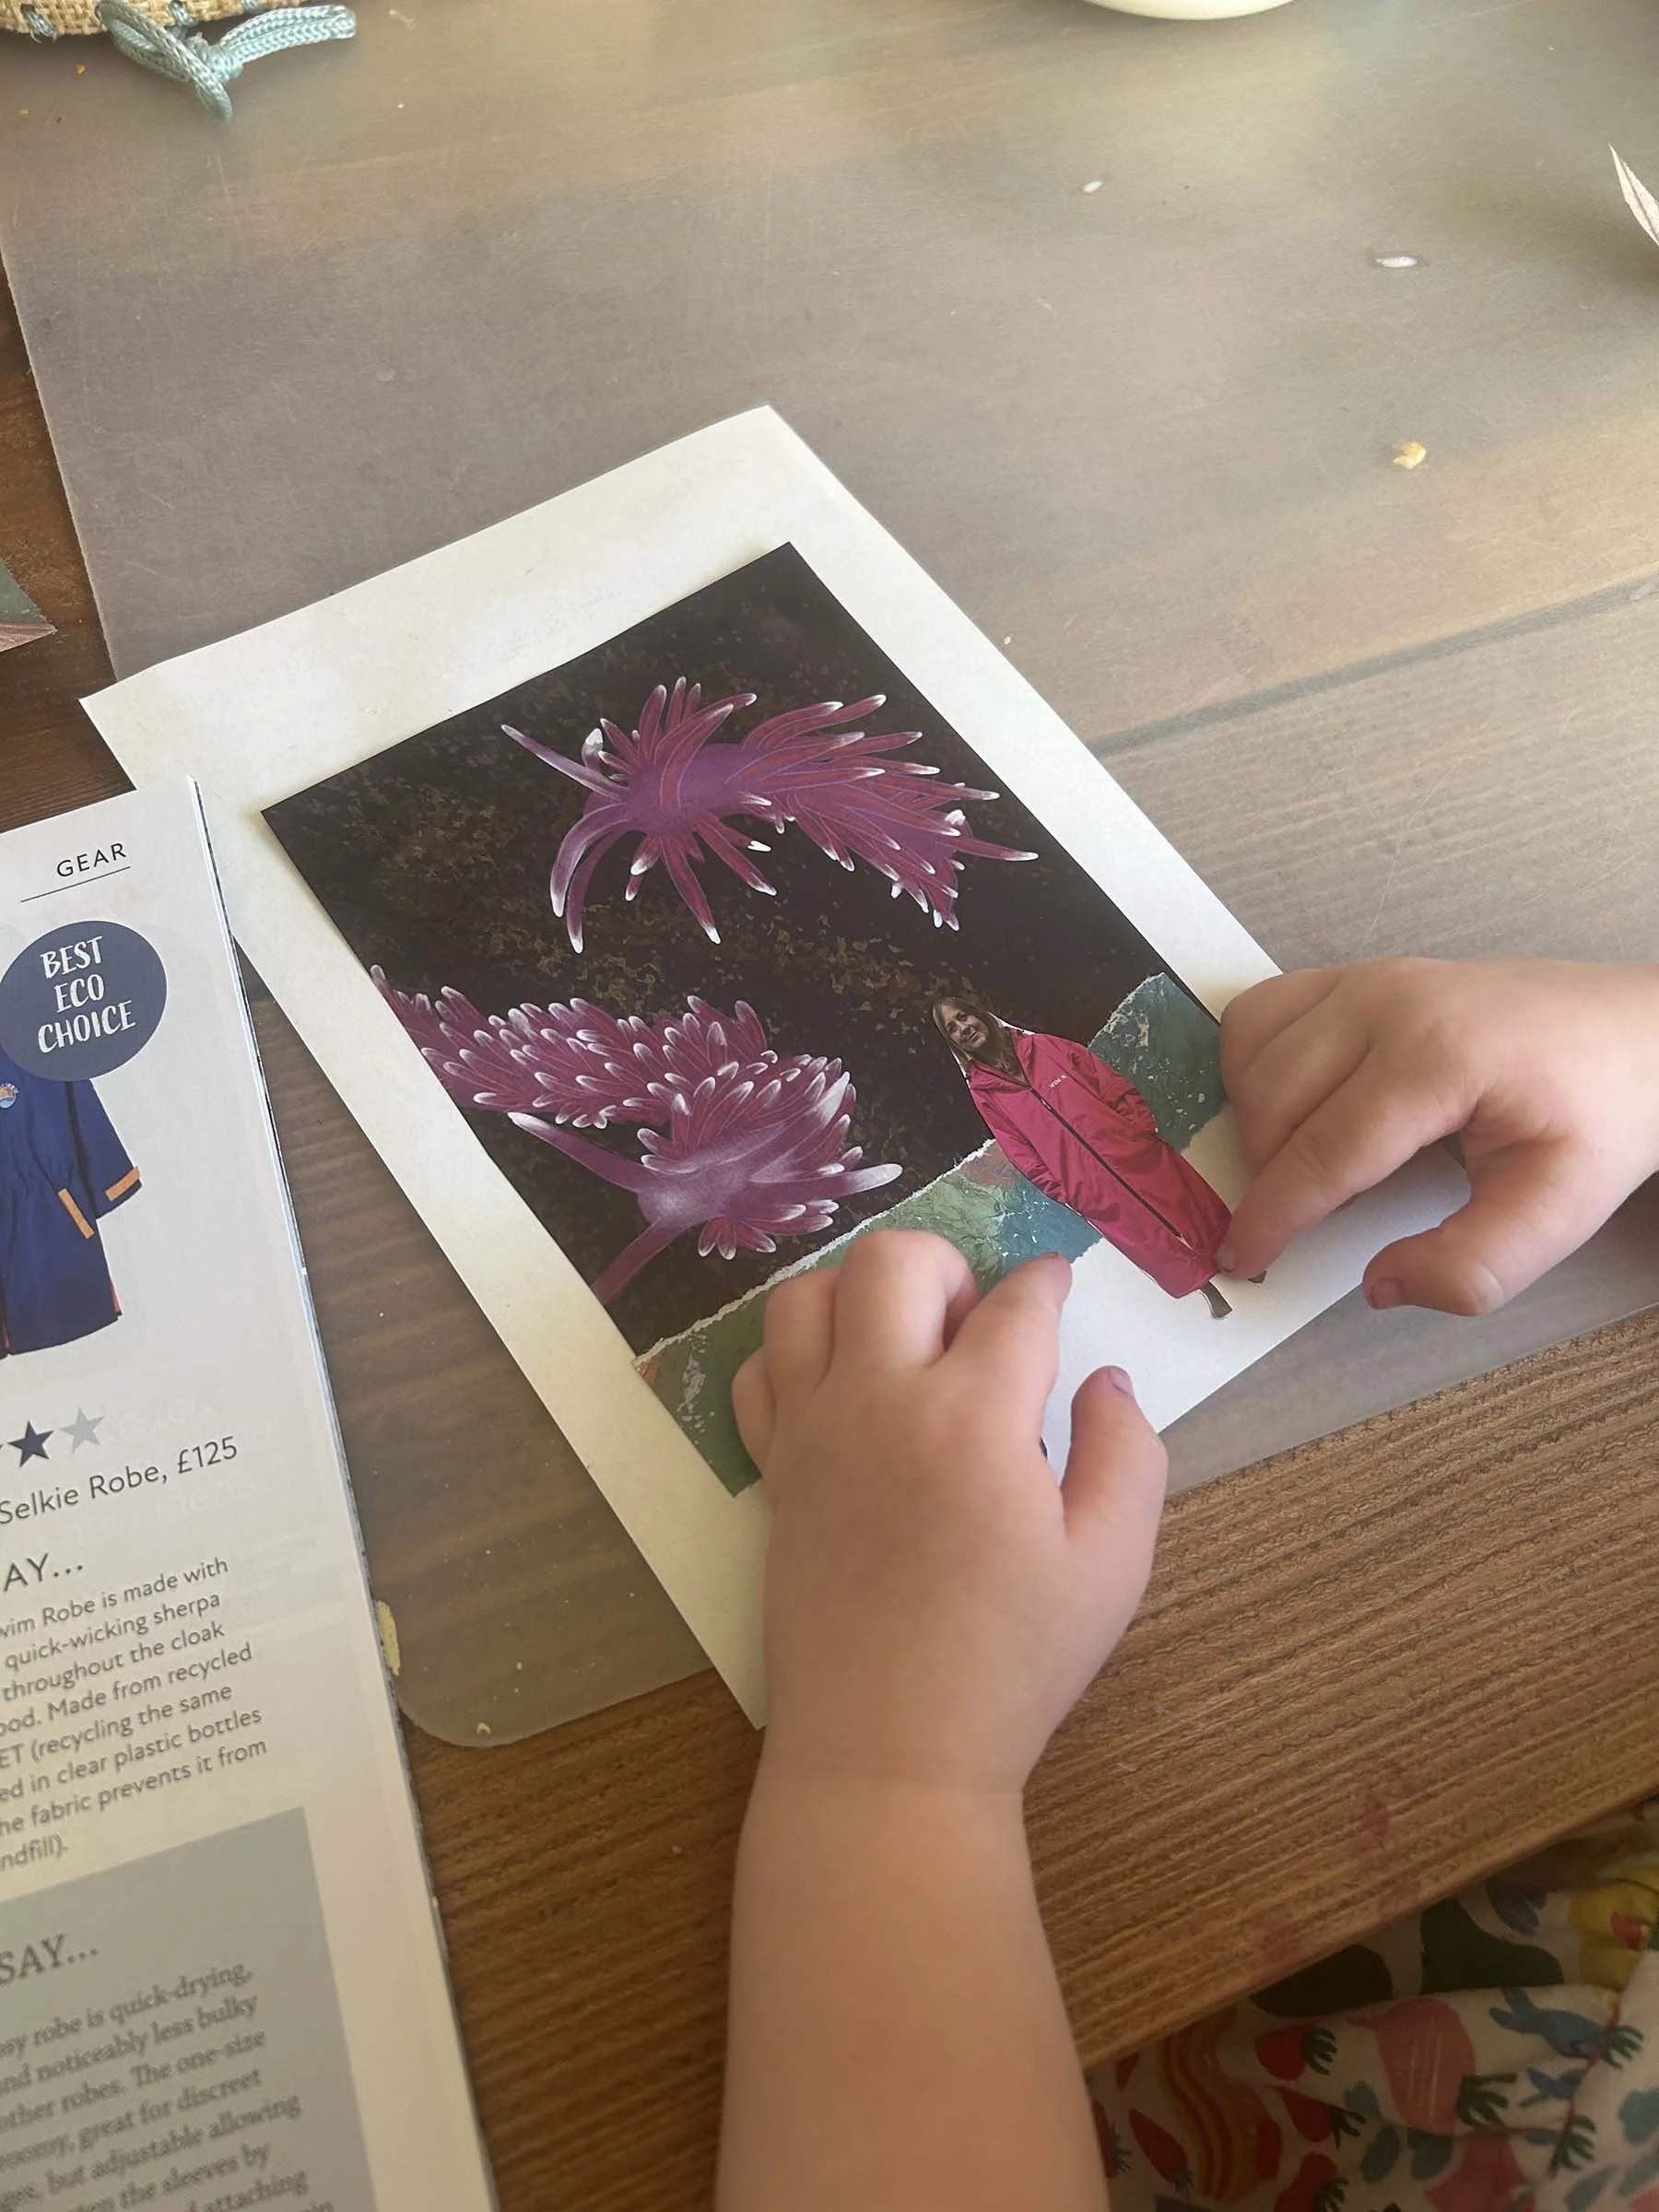
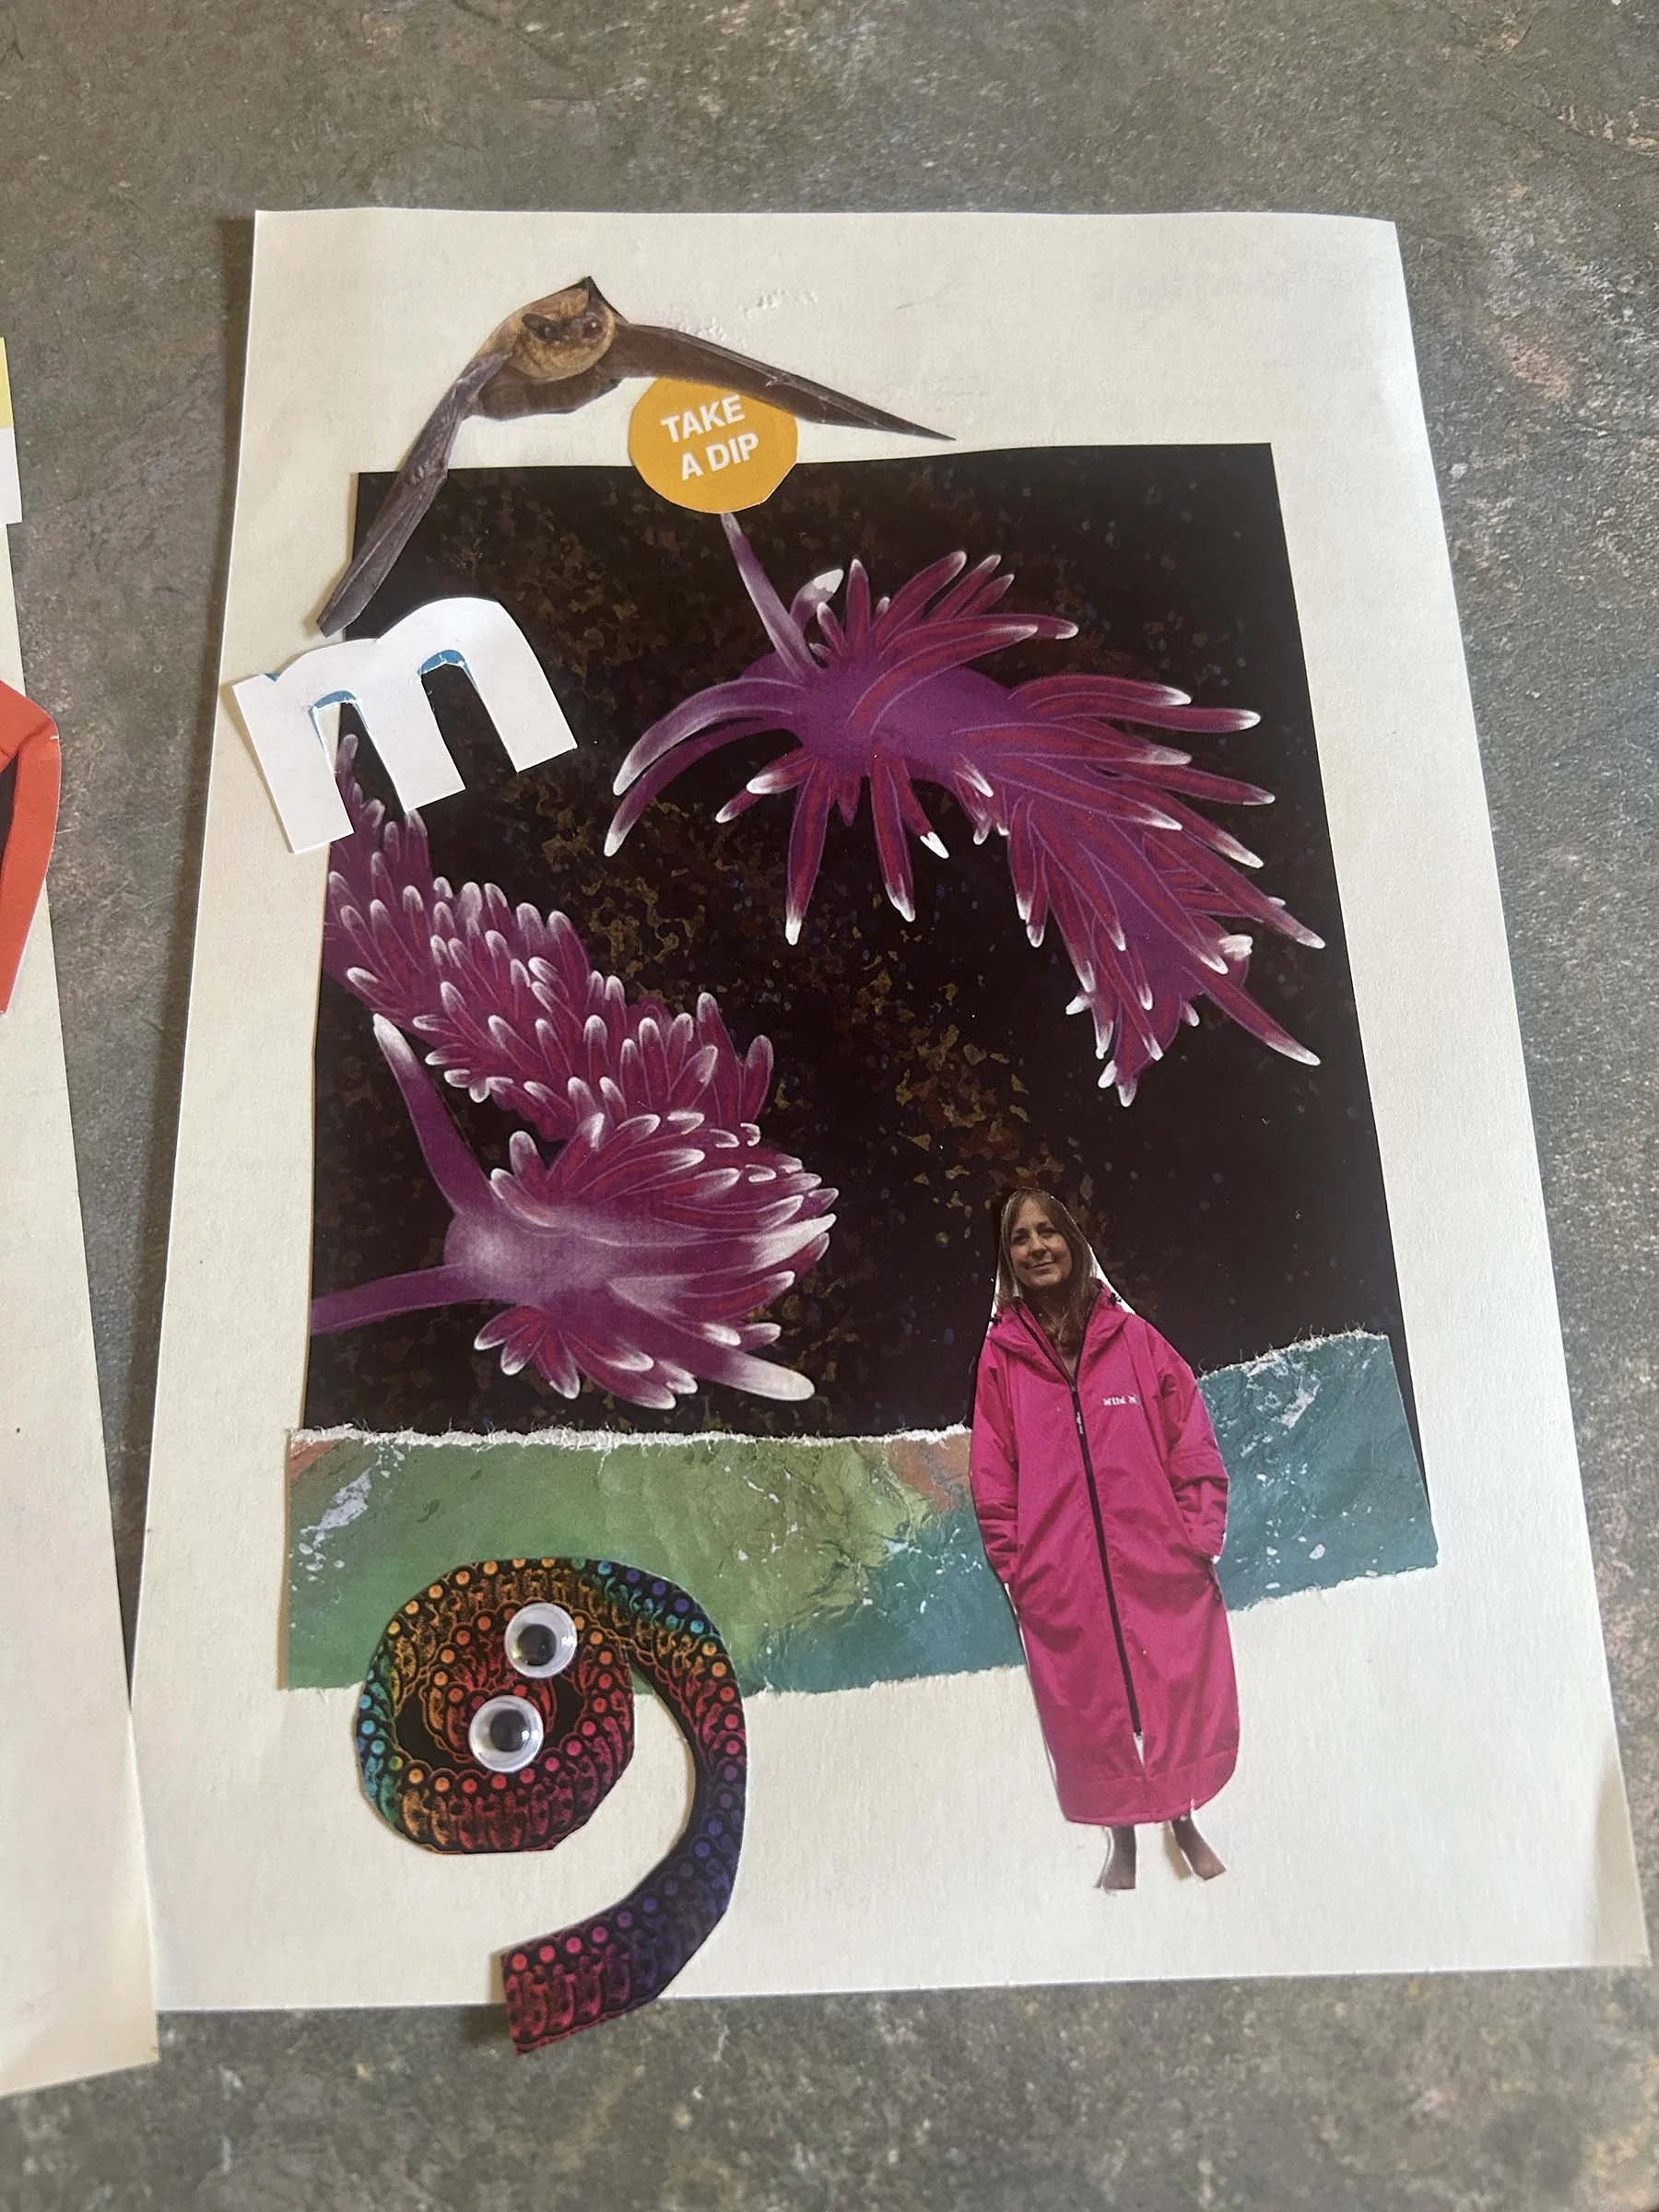
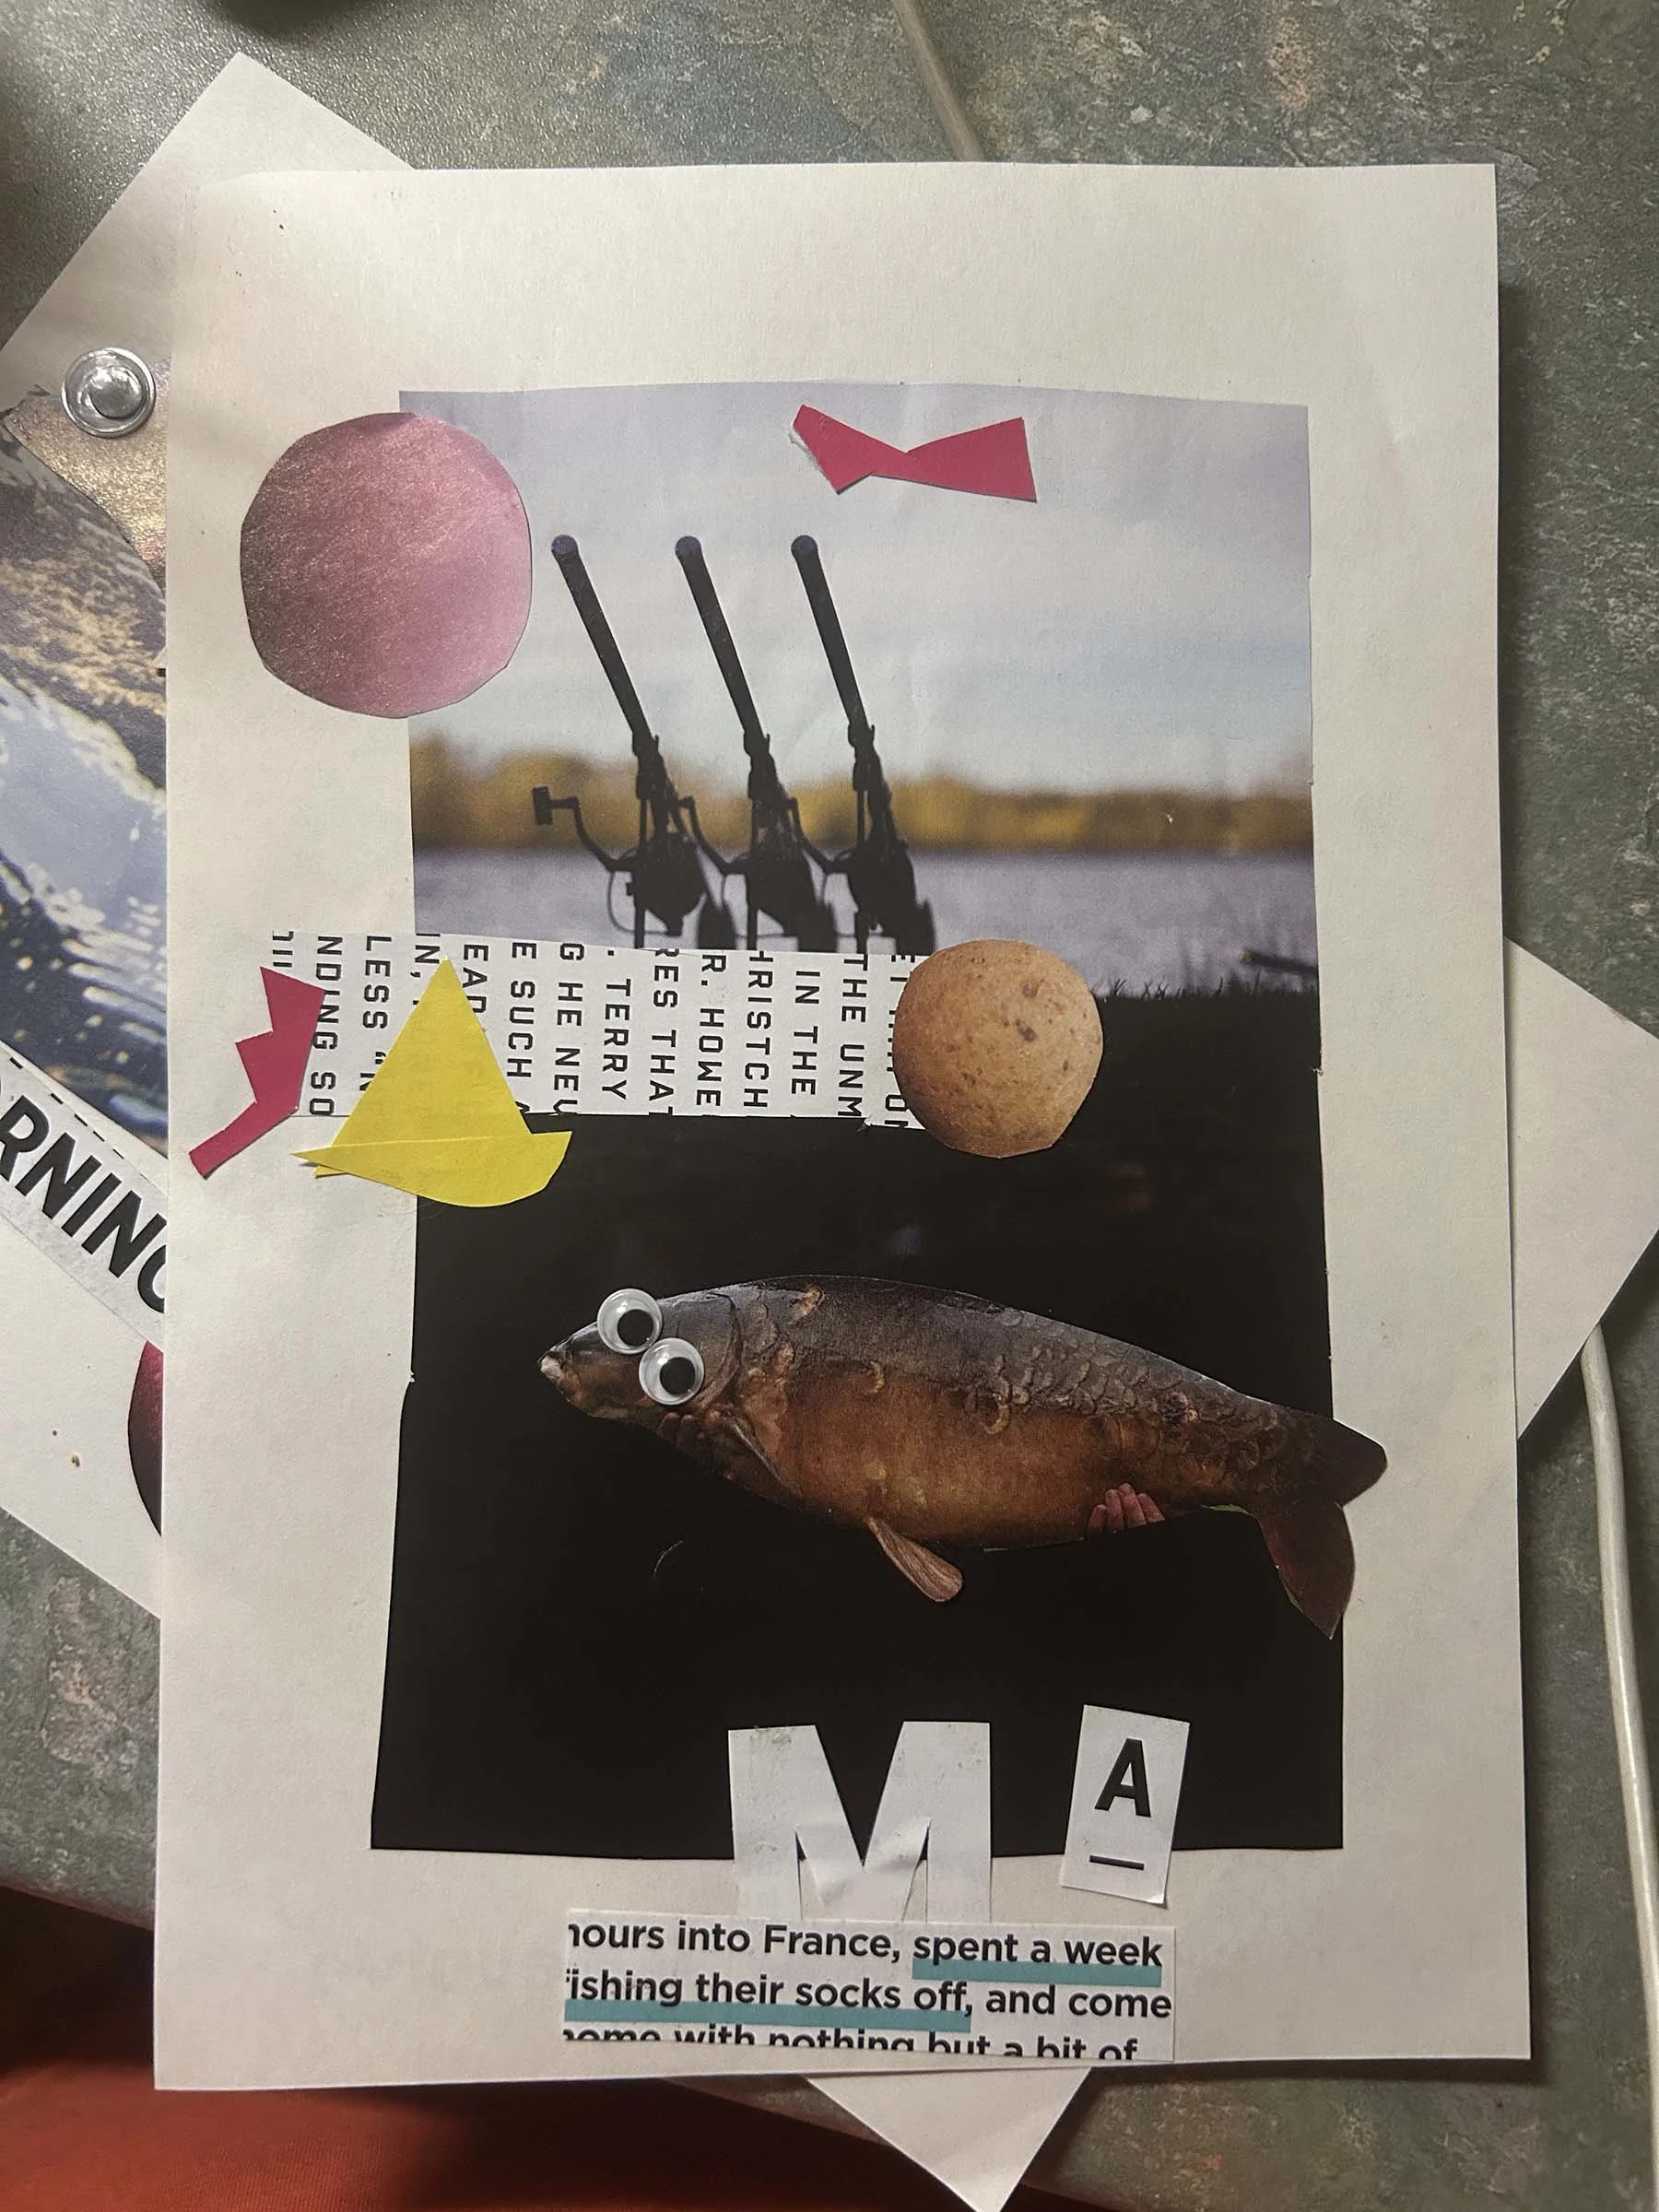
Crazy collage
A great way to repurpose old adventure magazines (we used a mix of wild swimming and fishing mags for ours). Sit down with your little one and flick through together, asking them which pictures they’d like to use, then cut them out for younger kids or let older children do it themselves. Once you’ve built up a pile of images, start with a large picture as the background and let your child choose what to stick around it. To make it more funky, add in bold shapes or letters cut from plain paper for a pop of colour. Flo loved adding her signature googly eyes to some of the cutouts, but you could also experiment with crayons, glitter, tissue paper or anything else you have to hand. This one turned out to be just as entertaining for me as it was for her!
Materials
Magazines
Paper or cardboard
Prit stick
Scissors
Optional: Glitter, googly eyes, tissue paper

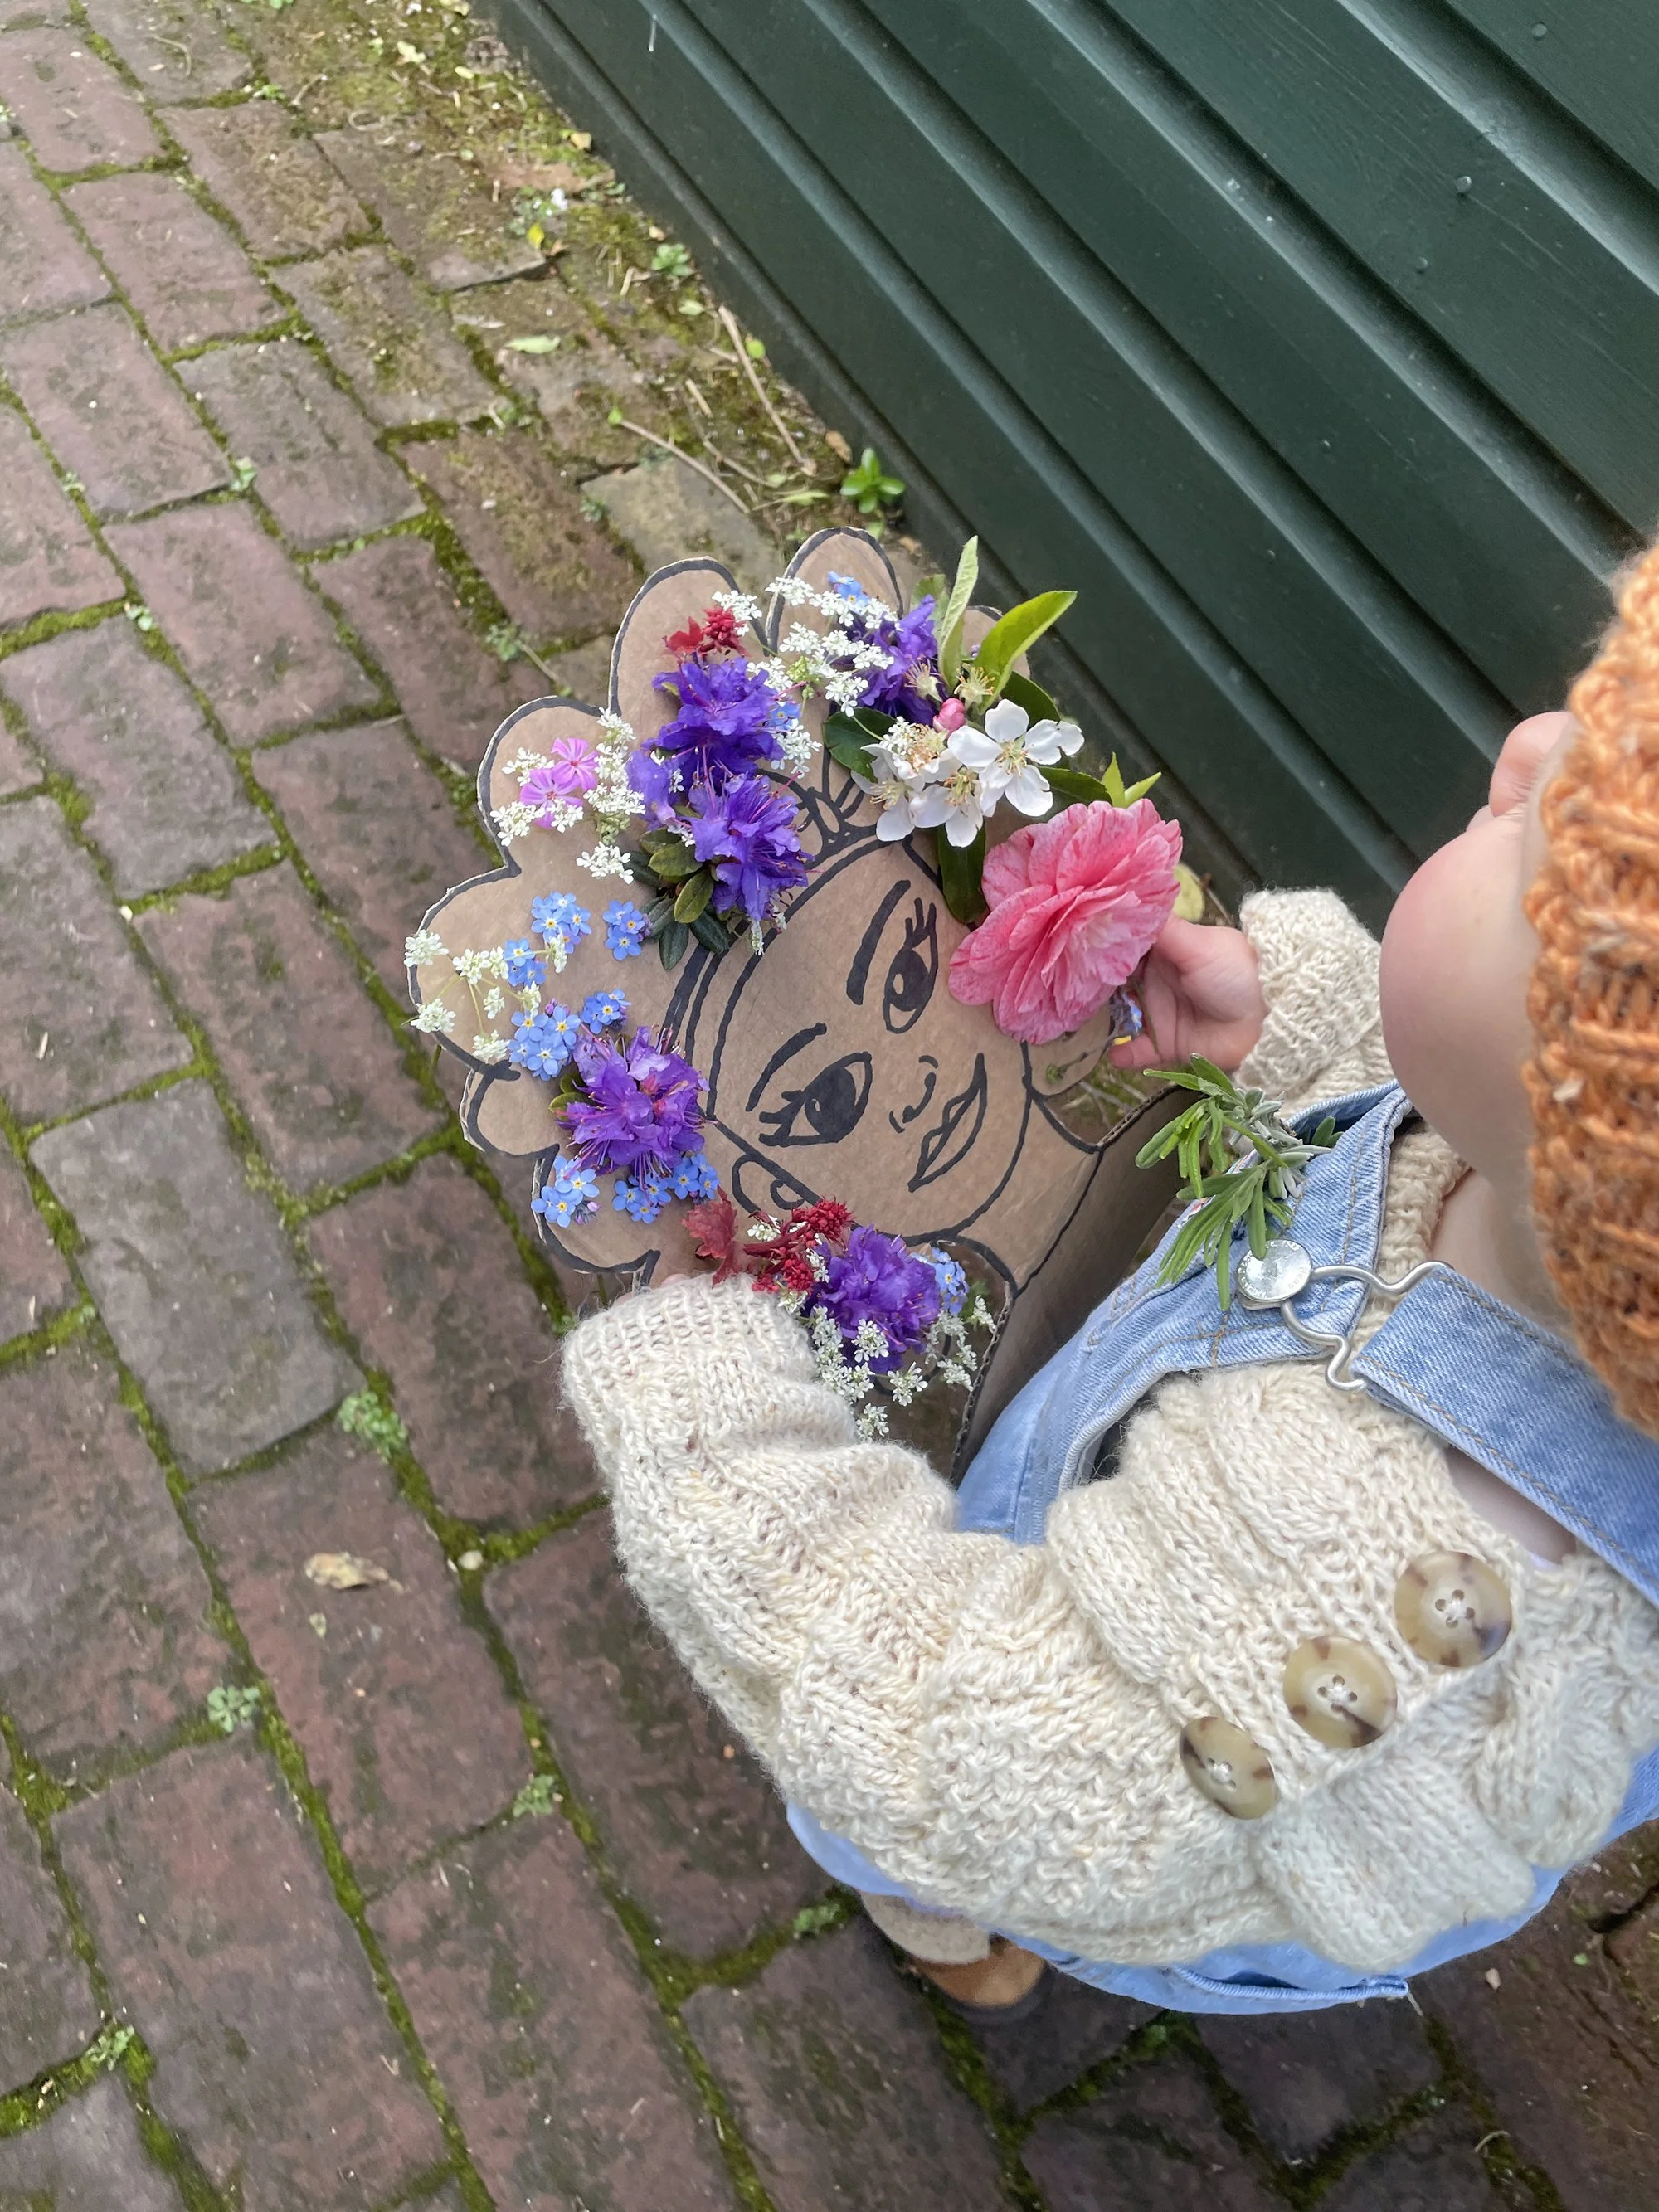
Funky flower head
This is a fun nature craft that little ones can make into anything they like especially great in spring or summer when your lawn or local park is full of wildflowers! Whether it’s a lion’s mane or a sheep with a woolly floral back you can tailor it to their interests. We did this one in the garden, but it works well in the woods or on a walk too. Use a thick piece of cardboard (corrugated boxes work best) and draw a large face or head shape with a chunky marker. Then, poke holes in the card where you want to add flowers. Make sure the holes are big enough for small hands to use, but snug enough to hold the stems. Then find flowers to thread through the holes to bring the picture to life.
Materials
A piece of corrugated cardboard (e.g. from a delivery or cereal box)
Marker pen
Ballpoint pen, screwdriver, or something to poke holes
Daisies, dandelions, or any flowers found outside

Stick boat
A simple, fun craft for warm days and water play. Build a mini raft from sticks and test it out in a stream, paddling pool, or even a messy tray. Kids can race their boats or blow them along with a straw to see how far they go or try balancing little figures on their raft.
Use a leaf, scrap of fabric or cut a card triangle and have your child scribble a design on it for the sail.
Materials
Small sticks (make sure they are dead/dry for floating)
String, masking tape, or a hot glue gun to fix the raft together
Leaf or scrap fabric for a sail
Straw (optional, for blowing the boat along)


Pressed flower butterfly wings
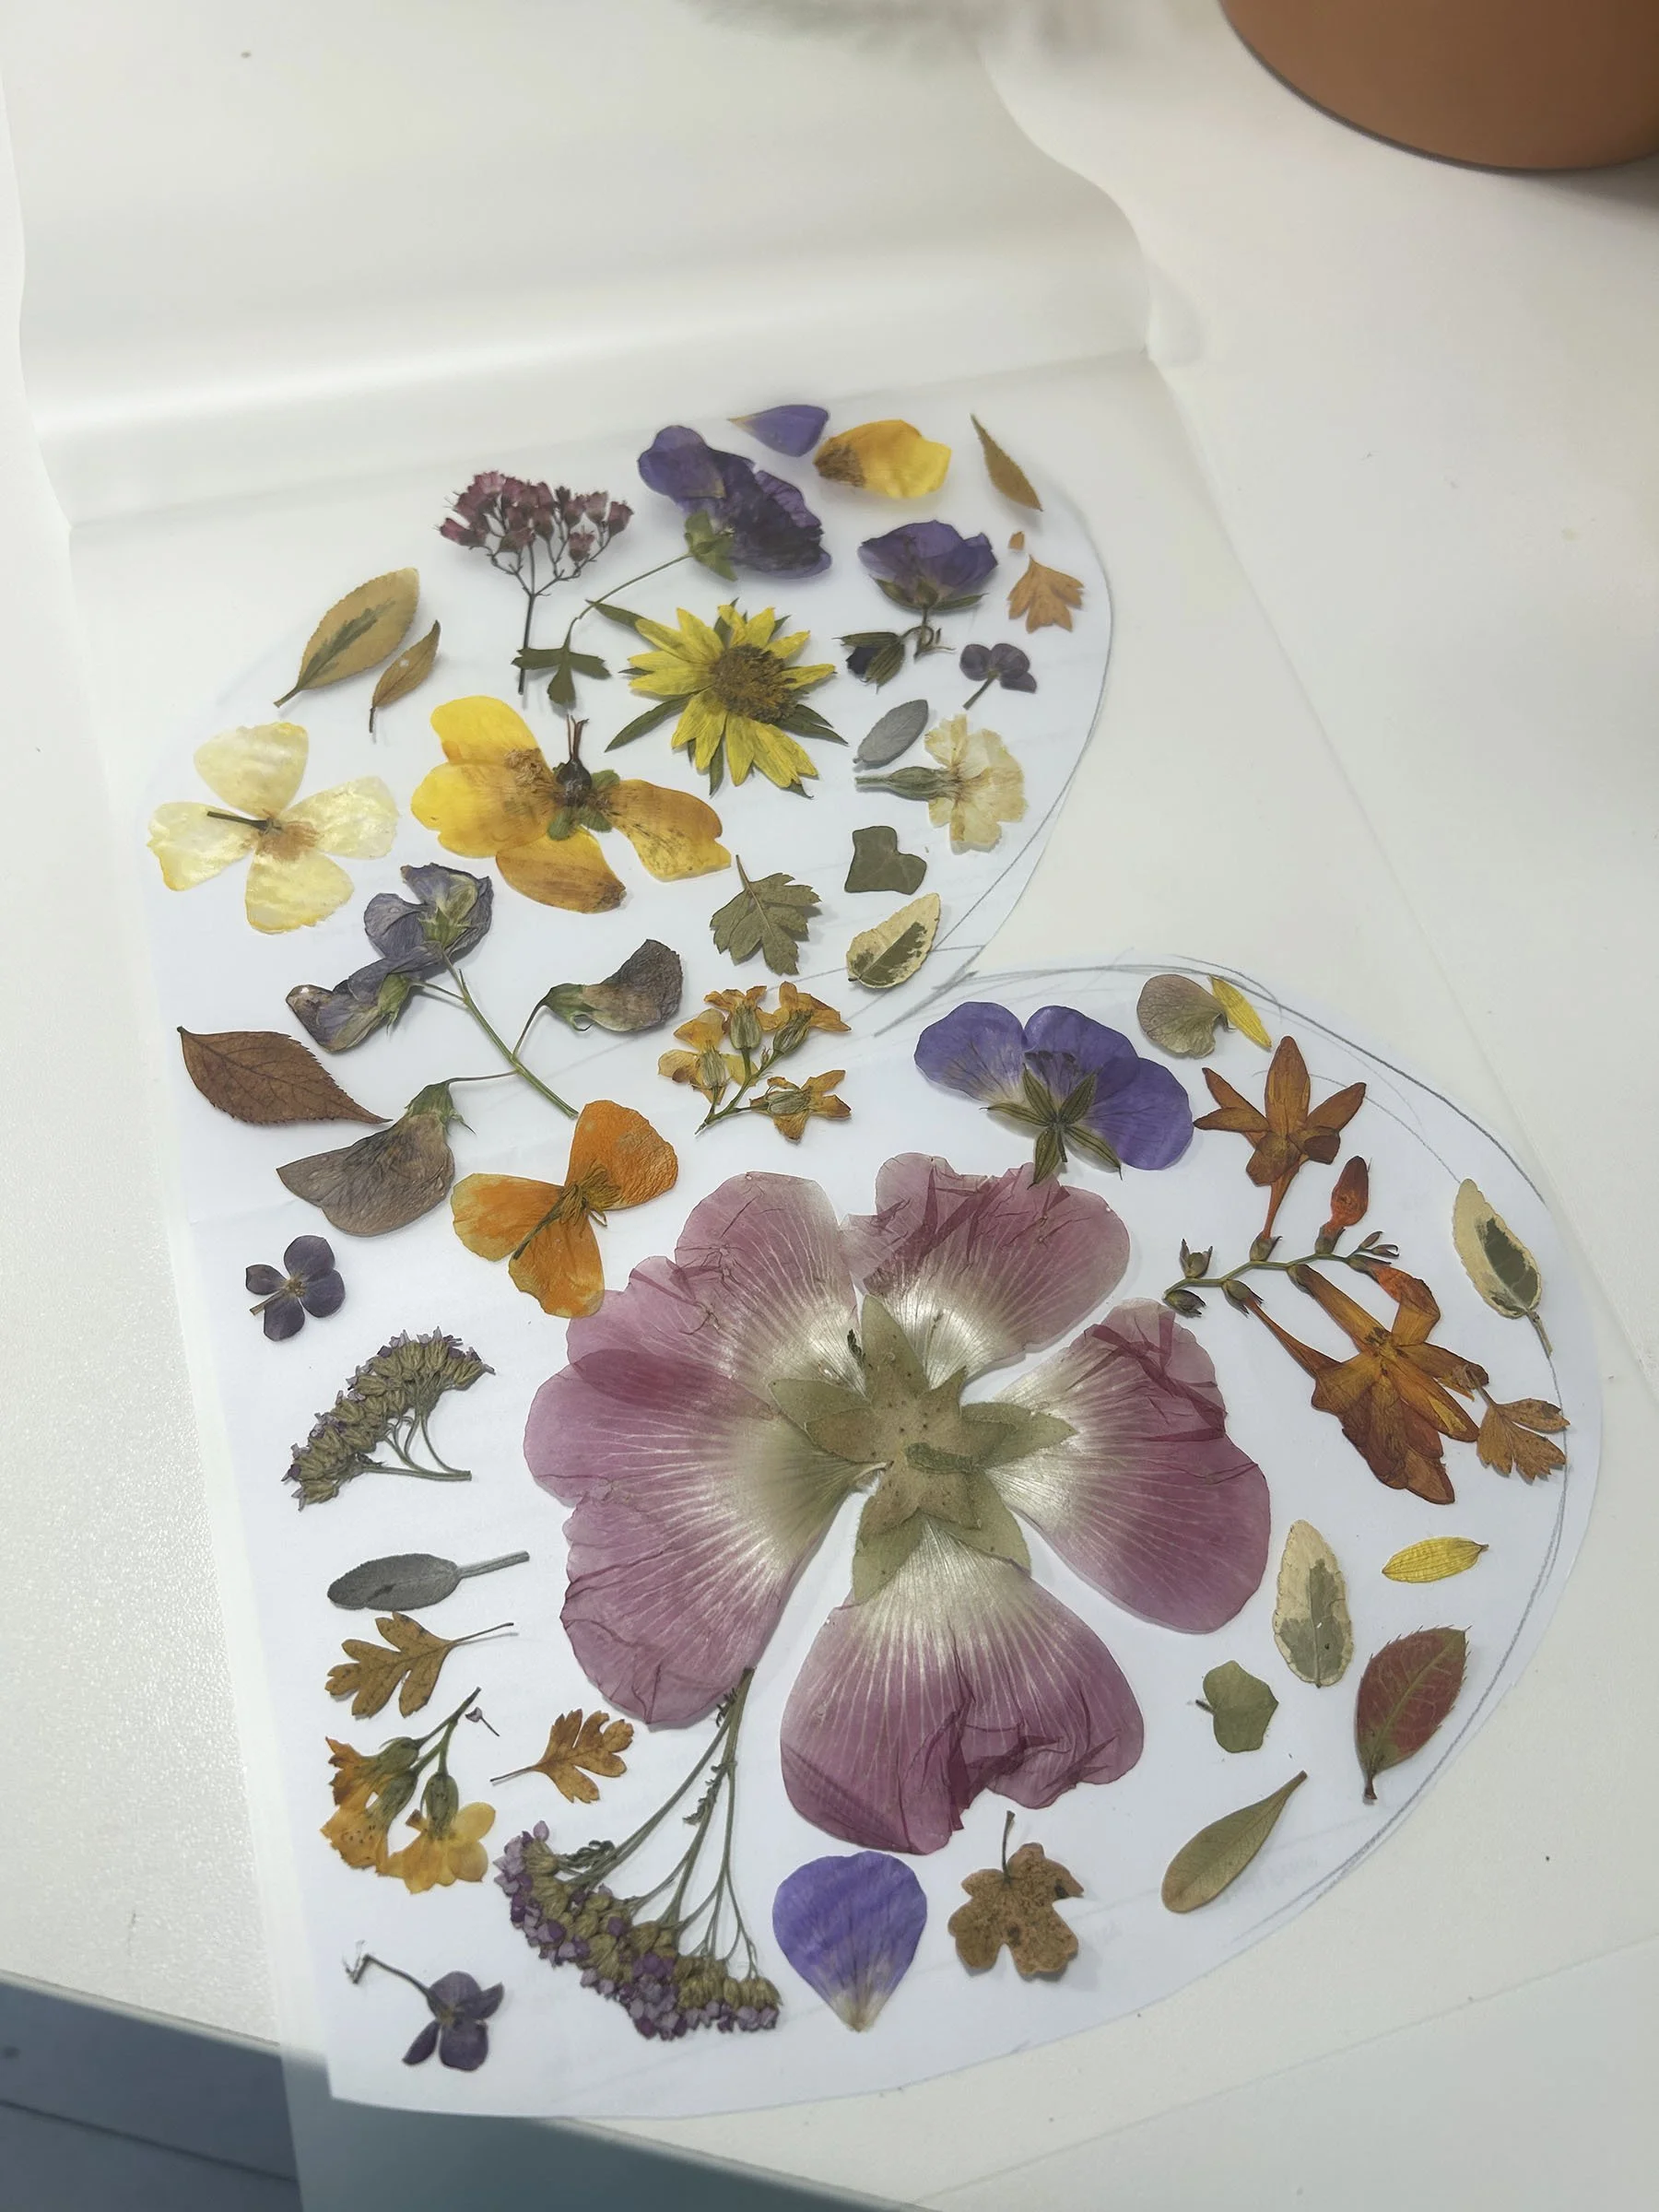
This one takes a bit more prep and adult help, but the result is a really lovely, nature-inspired craft that feels extra special. Start by collecting flowers and pressing them in a flower press or between sheets of paper under some heavy books. Once they’re dried, cut out a wing template from paper to guide your shape. Place the template under laminating pouches so your child can arrange the pressed flowers on top. It works best to keep them towards the middle so the edges seal properly.
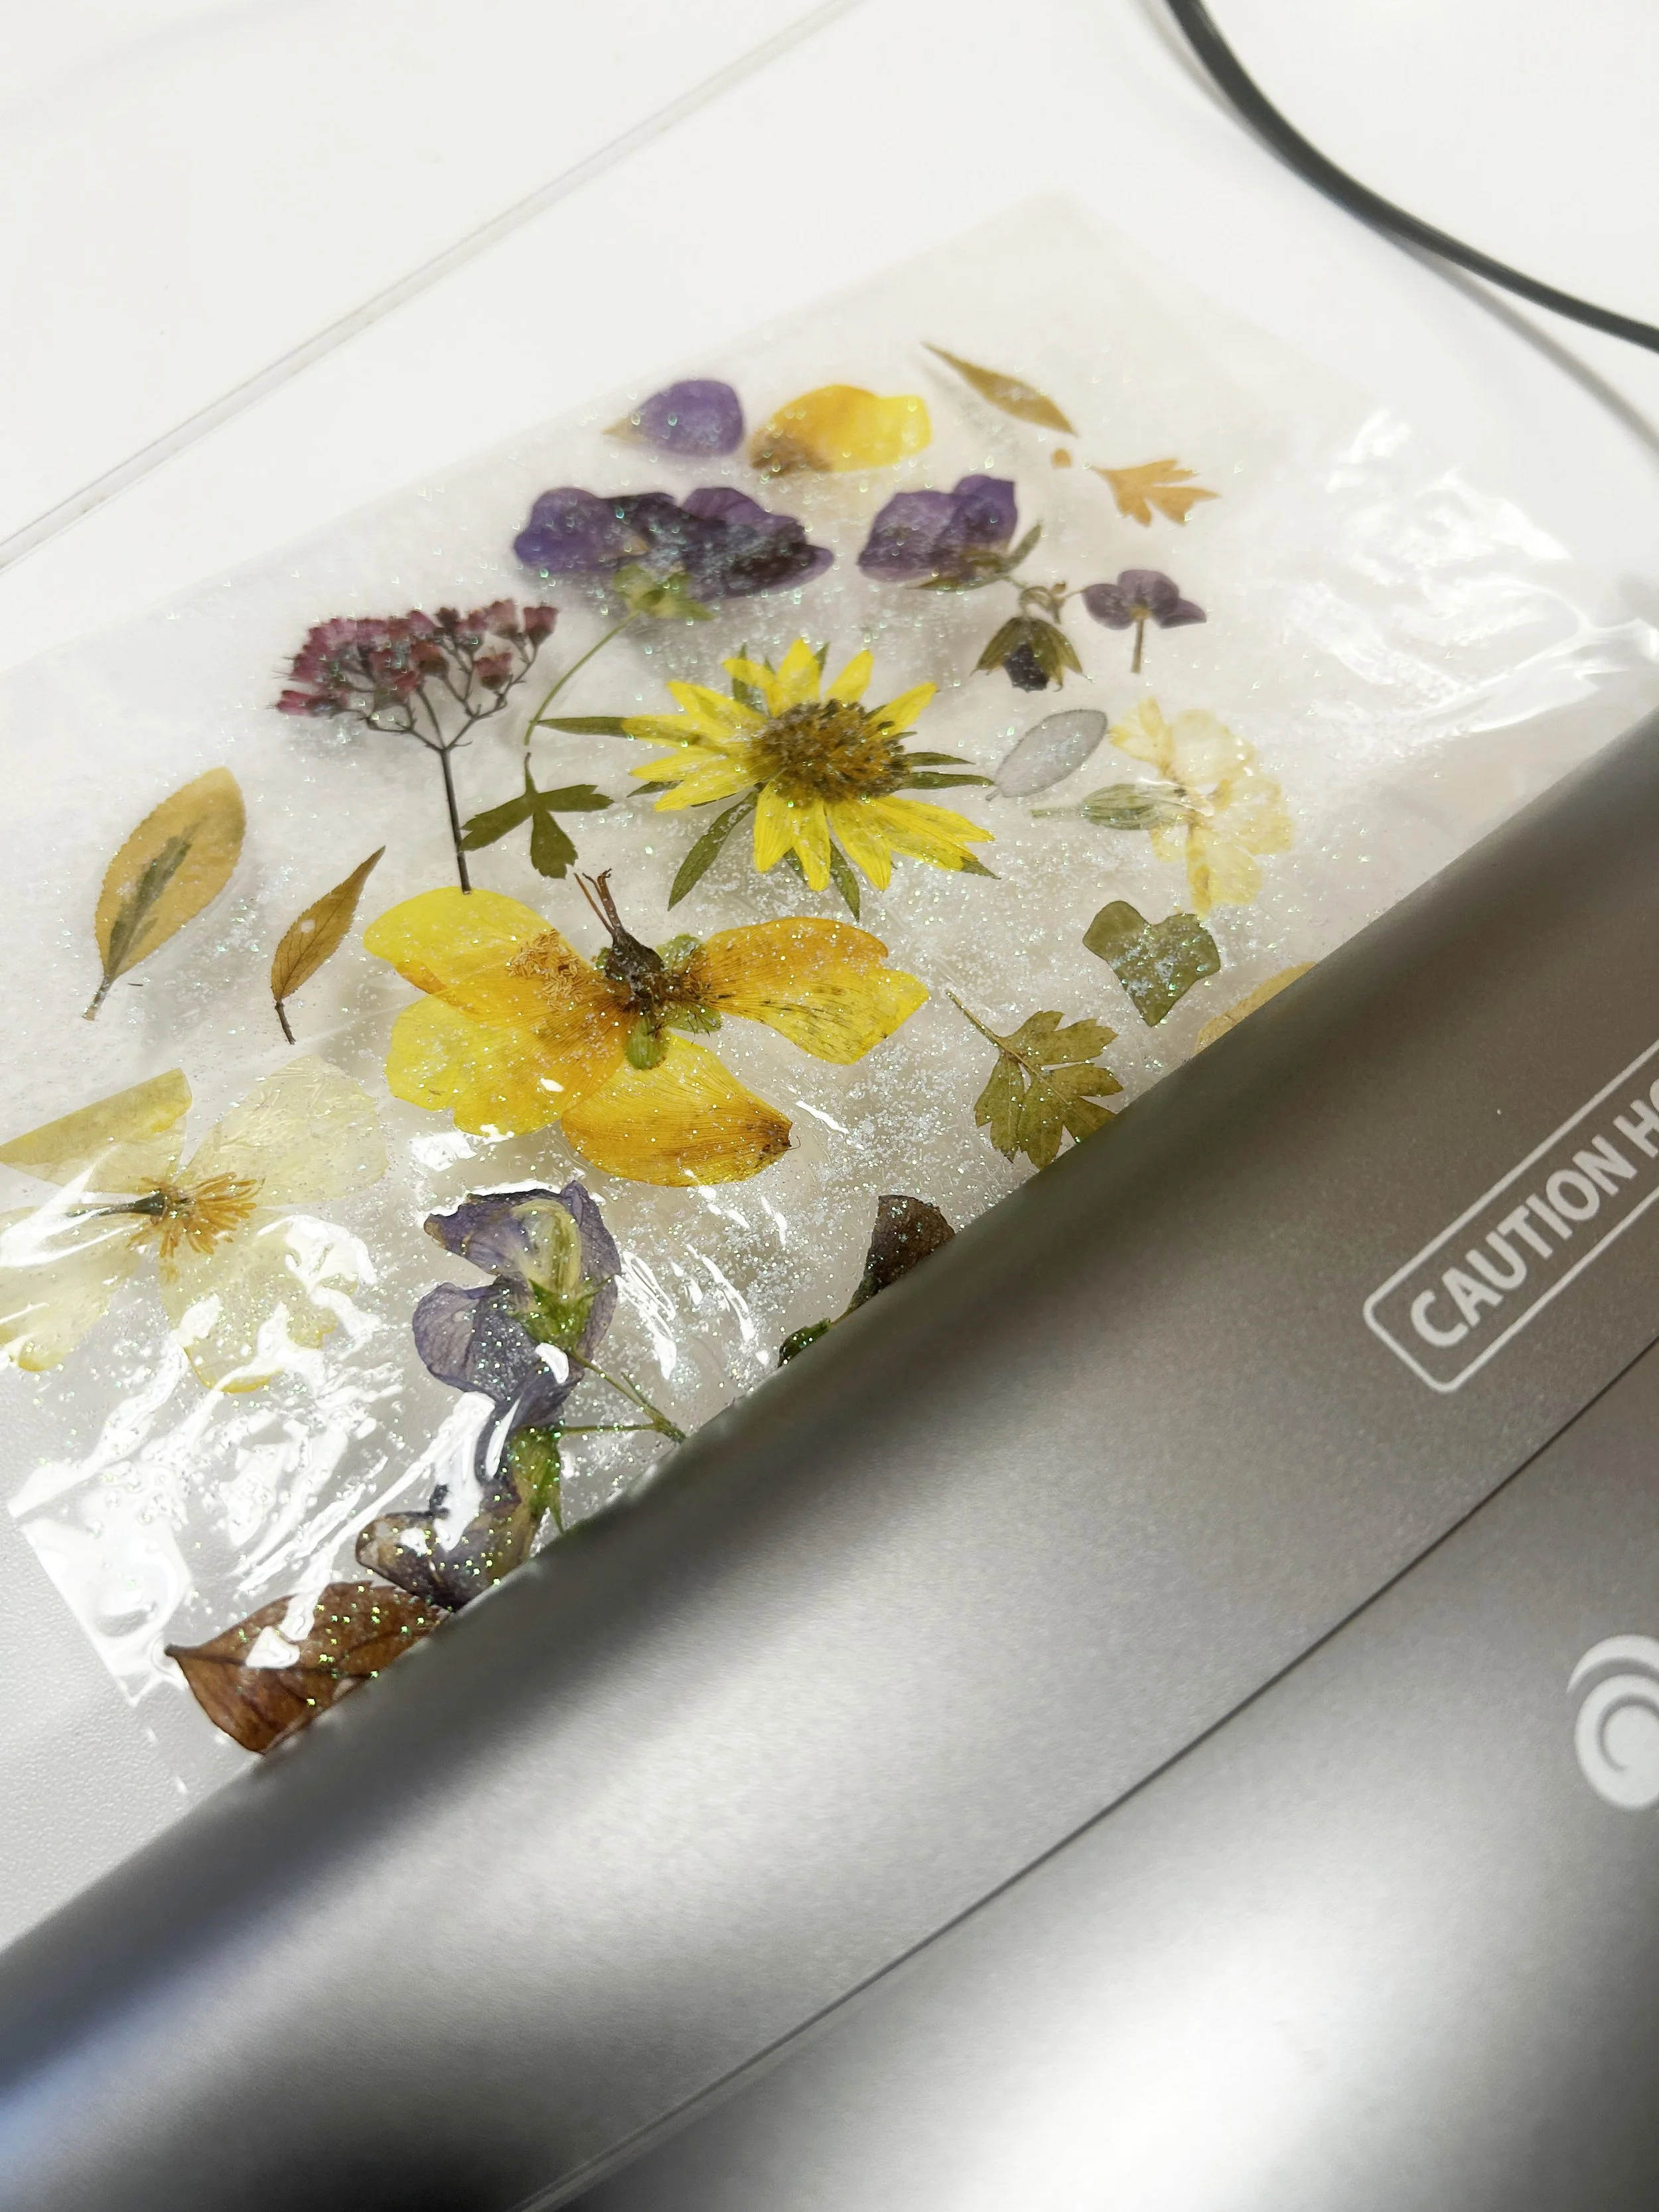
I’ll hold my hands up here and say I ended up arranging the flowers for Flo on this one, but older kids would love laying them out themselves. Once arranged, run the pouches through the laminator, then cut out your butterfly wings using the template, avoiding cutting directly through any flowers. For the “body,” head outside and let your little one choose a favourite stick that’s just the right size. Use a hot glue gun to attach the wings to the stick, then punch holes in the laminated sheets and thread ribbon, string or elastic through so the wings can be tied on and worn for imaginative outdoor play.
Optional: add a touch of glitter before laminating for some extra sparkle. We went a little overboard with the glitter and found the sheets didn’t fuse together quite as well, but Flo loved the shimmer, so it was still a win!
Materials
Pressed flowers (from a flower press or heavy books)
Laminator and laminating pouches
Stick for the butterfly’s body
Hole punch
Ribbon or string to tie on the wings
Scissors and glue gun for adult help
Optional: Glitter


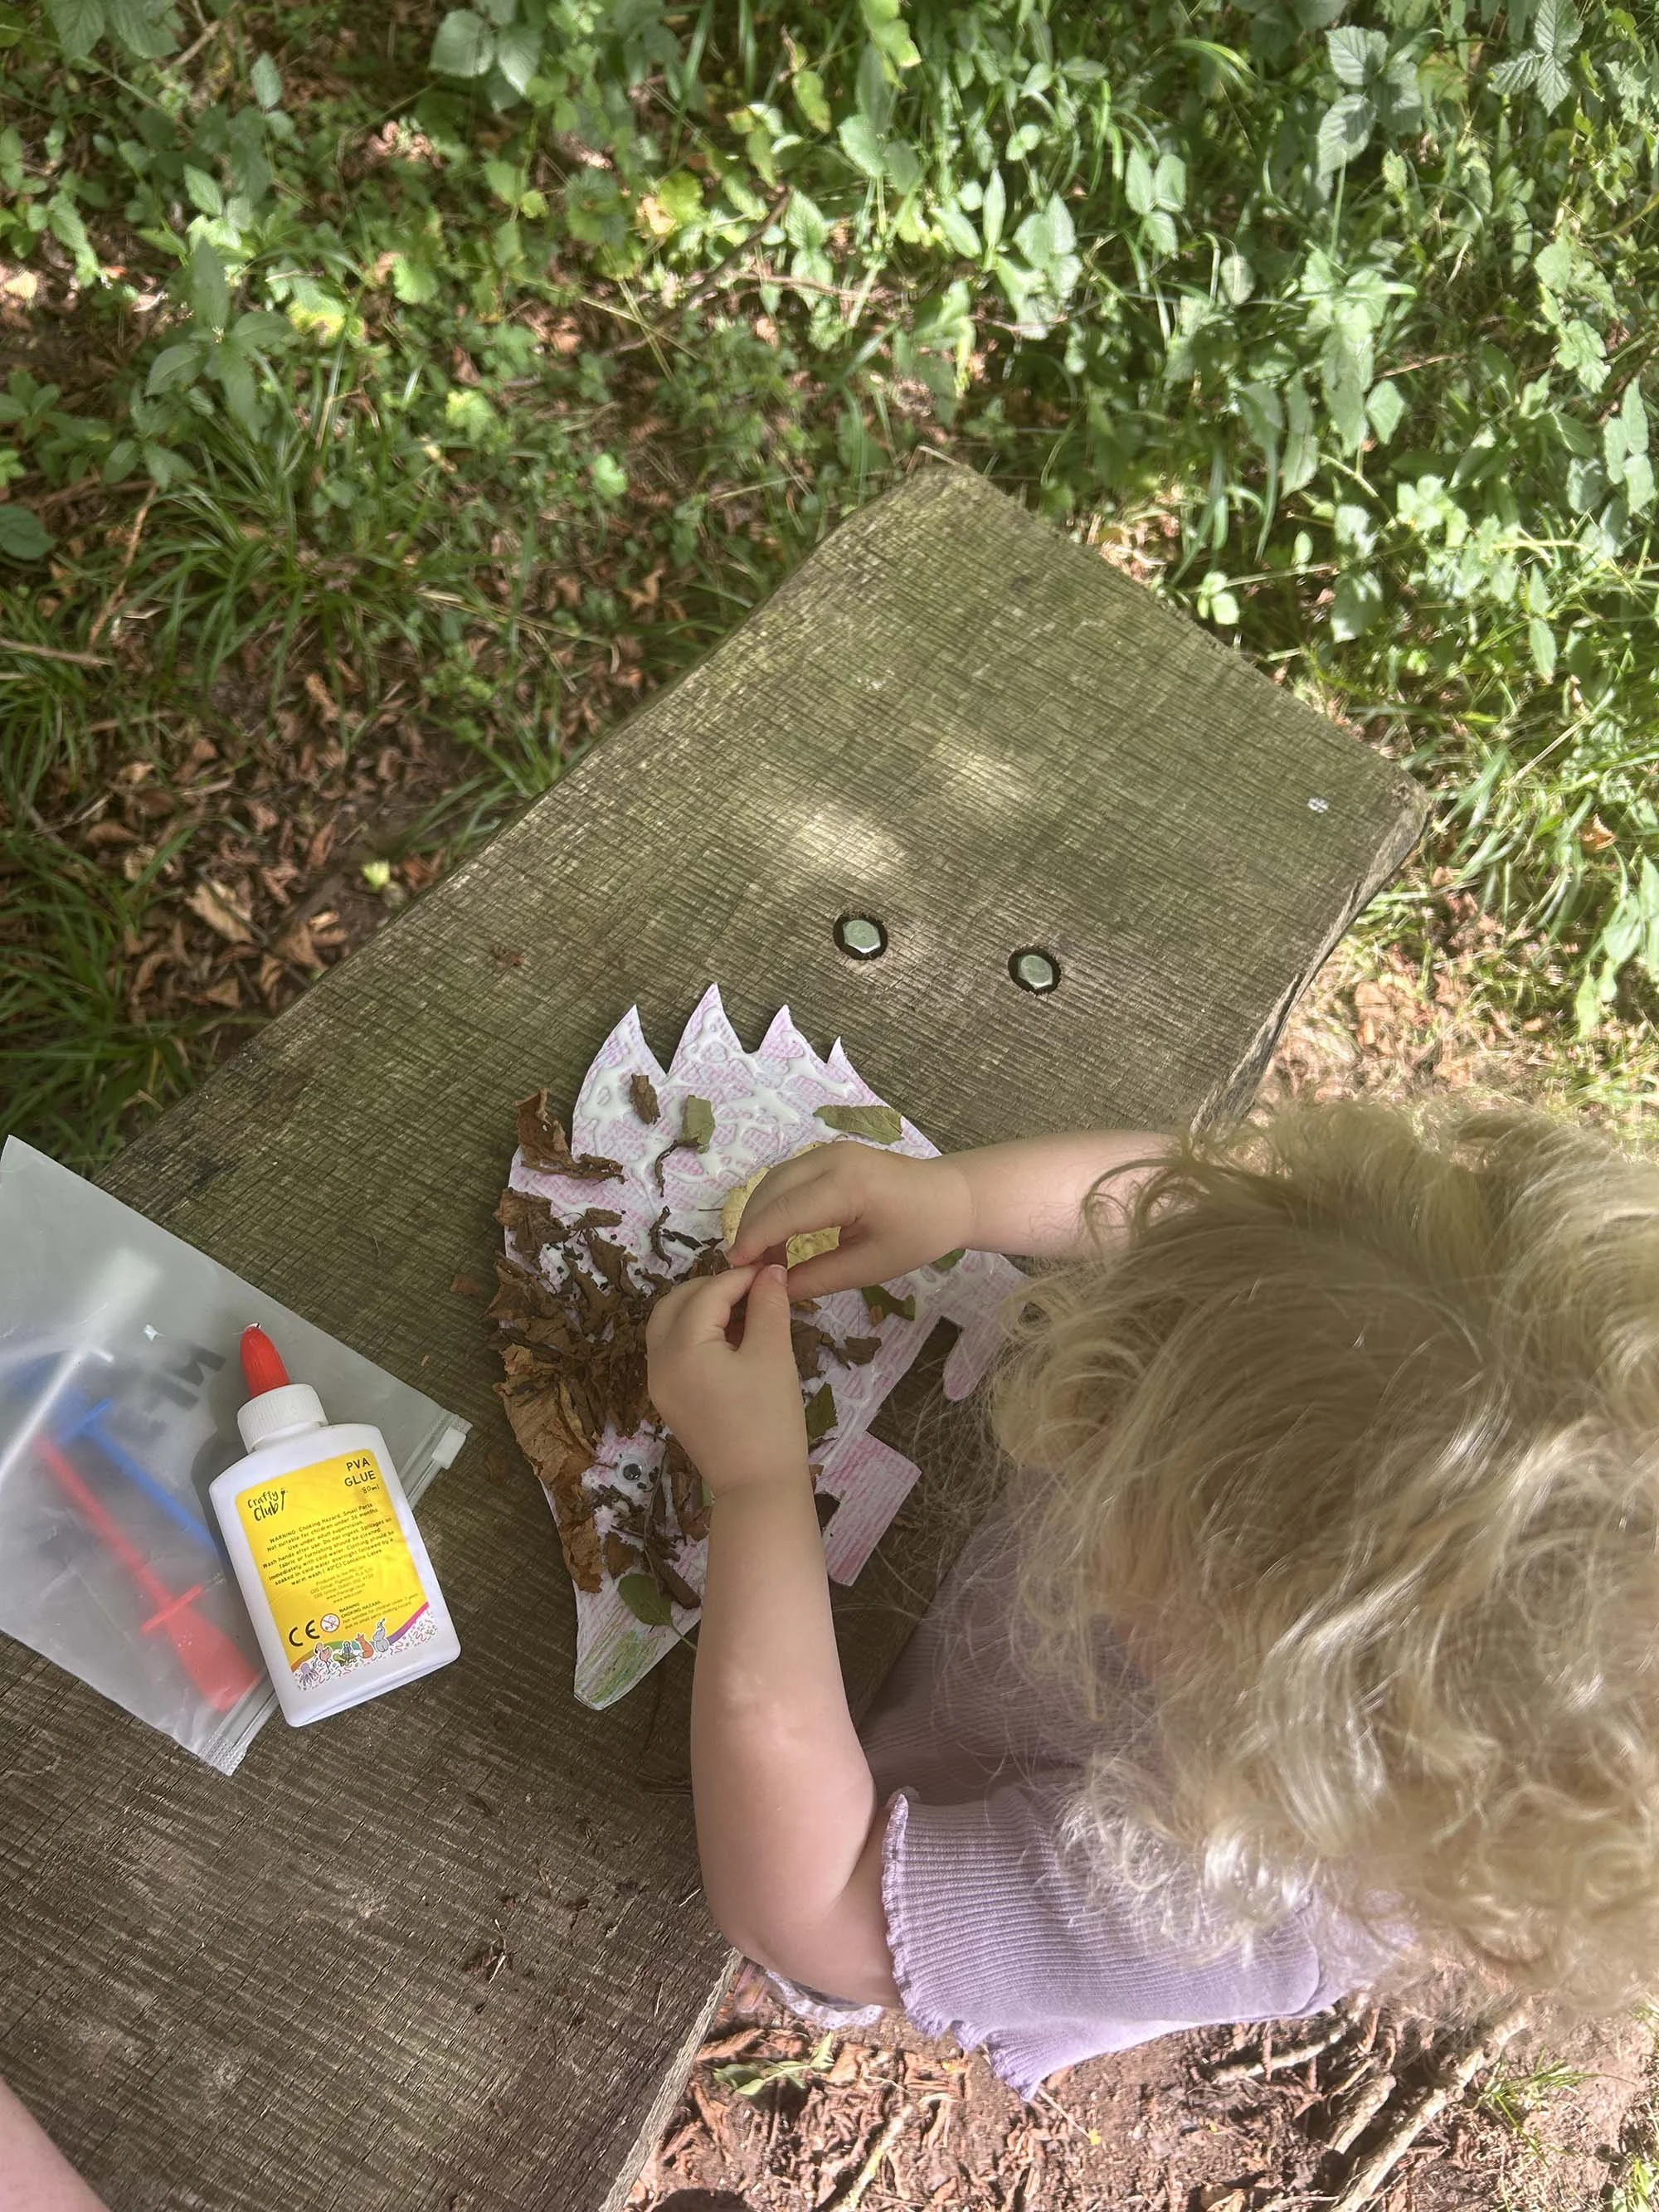
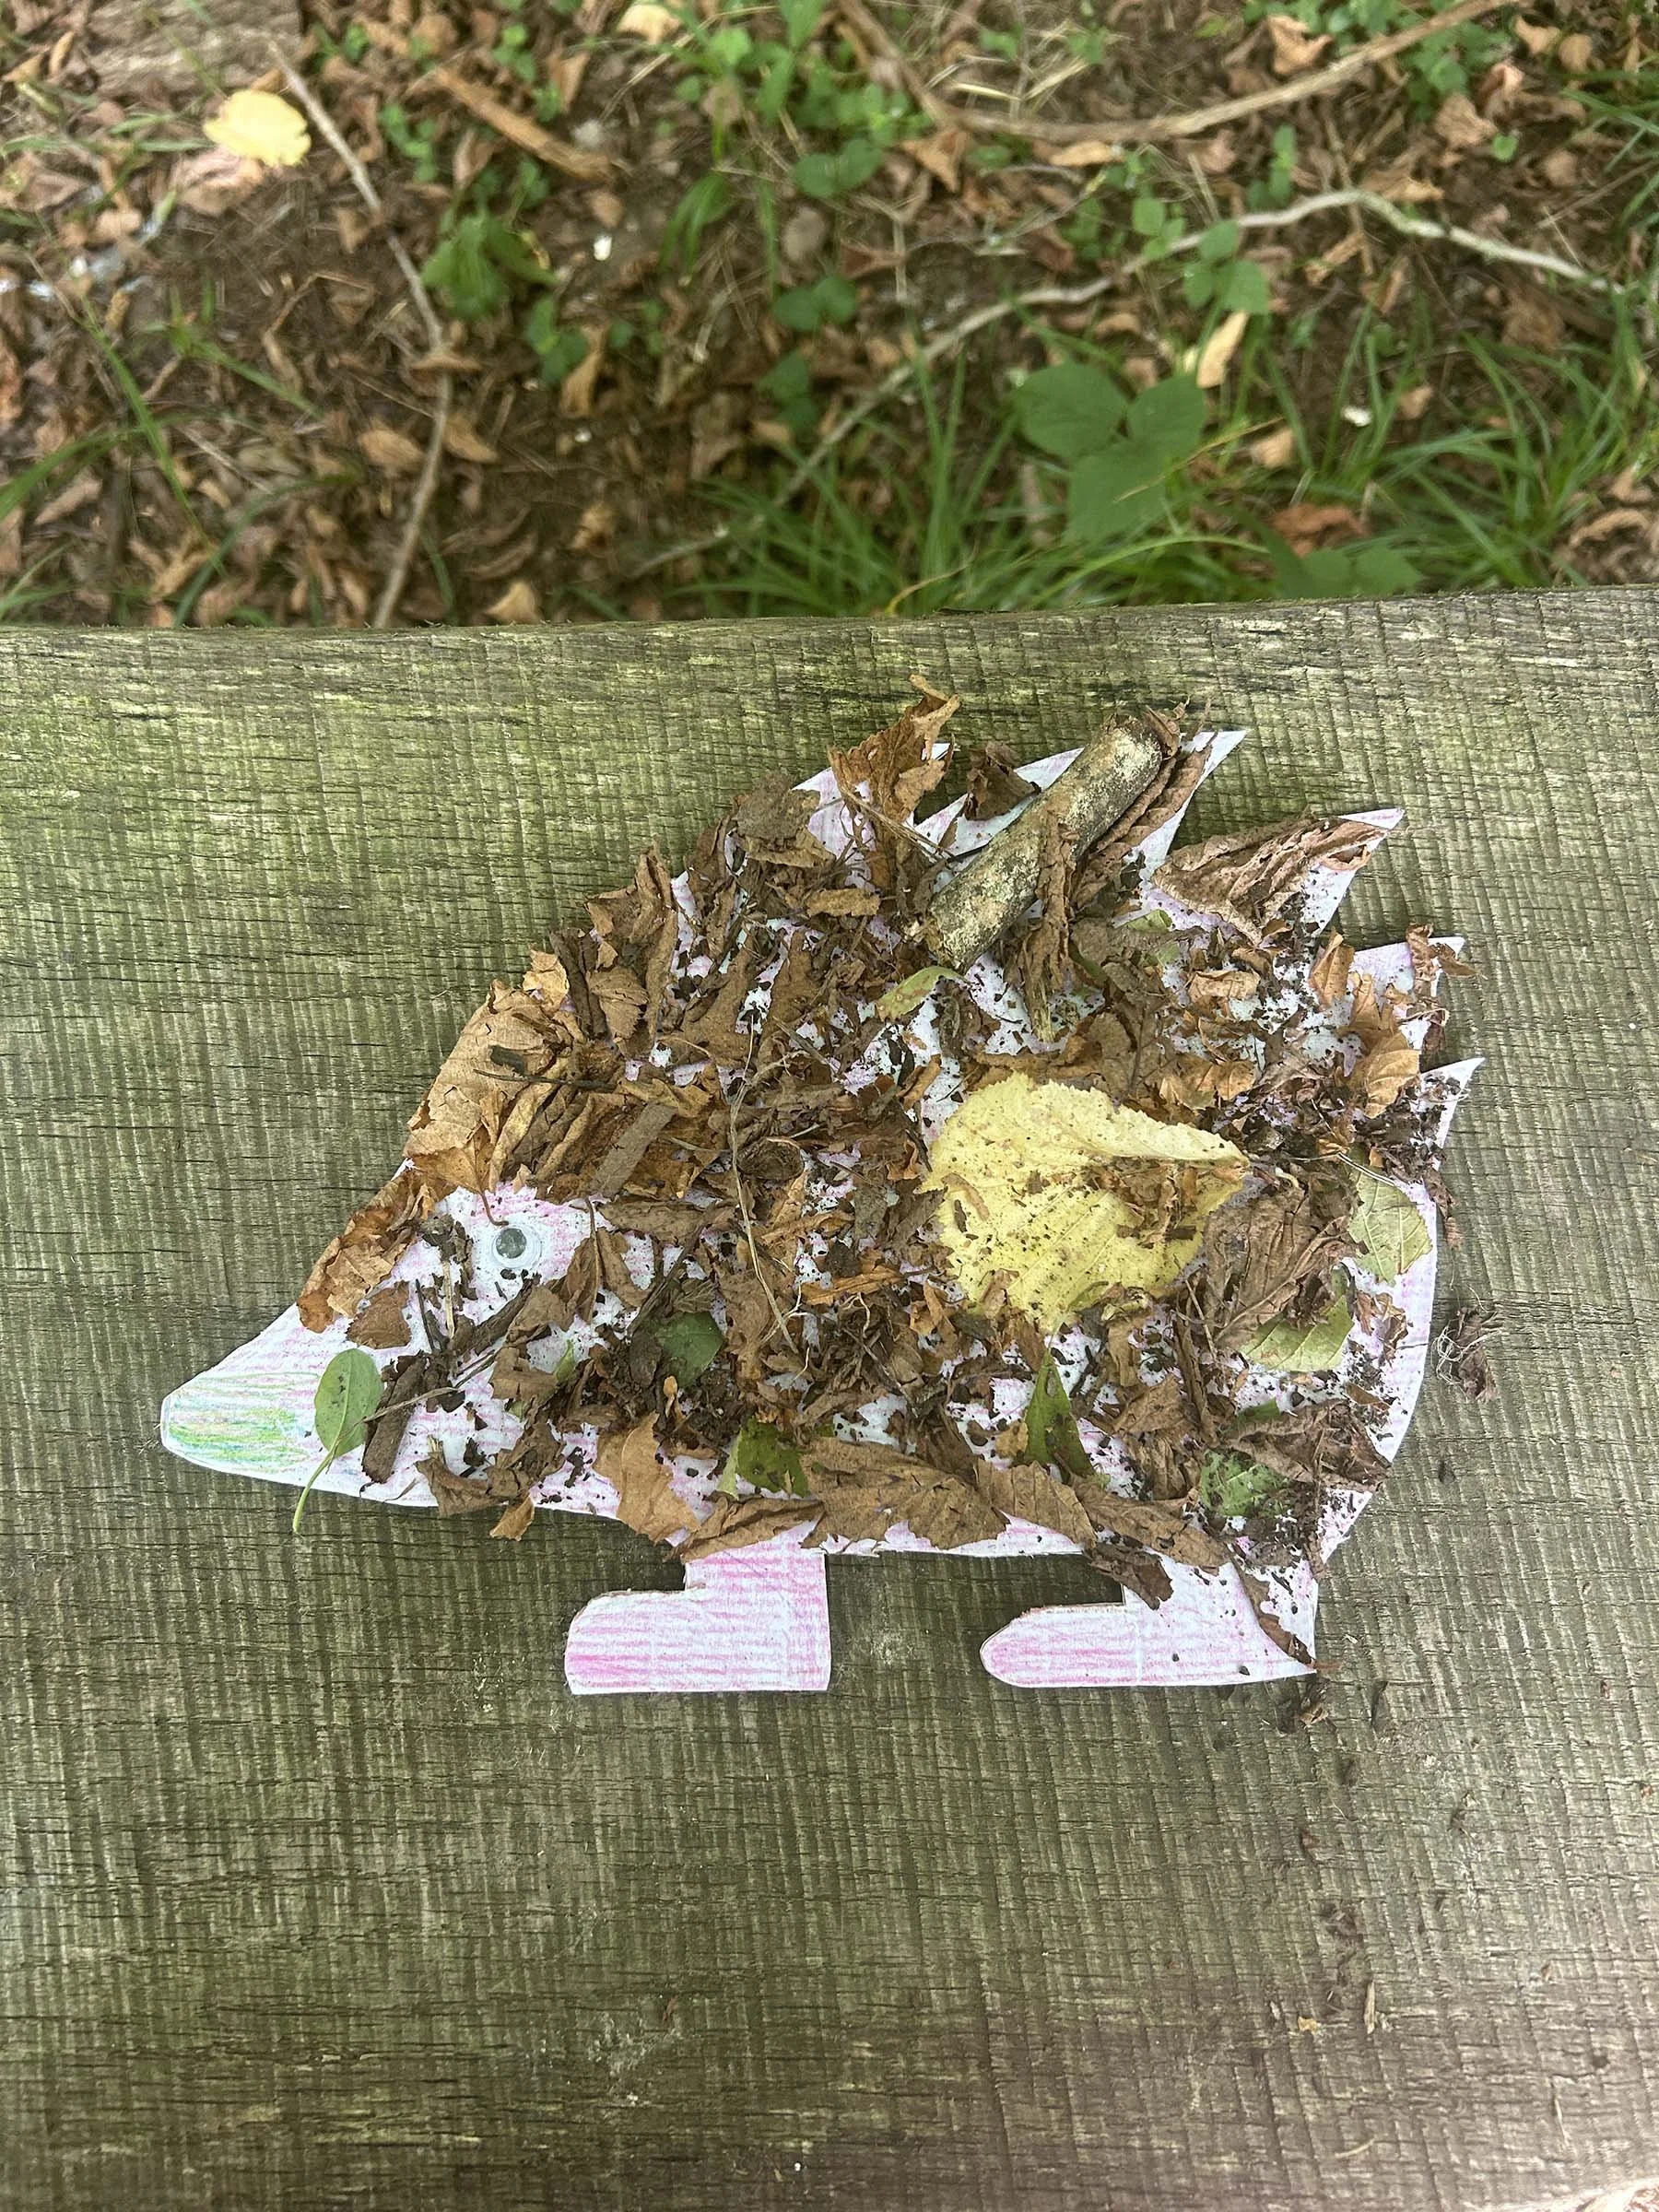
Leafy hedgehog
A simple craft to enjoy on a woodland walk. Before you head out, cut a hedgehog shape from cardboard and pack some PVA glue. Collect fallen leaves along the way, then take a pitstop on a bench or picnic blanket to create your hedgehog. Cover the cardboard in glue and let your little one stick on the leaves to make its spiky back. Ours was far from Pinterest-worthy, but it was all about the fun of creating and exploring textures. Add a googly eye or draw on a face for personality – then don’t forget to give your new hedgehog a name!
Materials
Cardboard
PVA Glue
Leaves from outside
Optional: Googly eye